MX Linux Users Manual
v. 20150707
HINTS
Ctrl-F = search this Manual
Ctrl-End = goto Glossary
Ctrl-Home = return here
— — -
FEEDBACK
Ctrl-F = search this Manual
Ctrl-End = goto Glossary
Ctrl-Home = return here
— — -
FEEDBACK
Email: manual AT mxlinux DOT org
Forum: MX Documentation and Videos
Forum: MX Documentation and Videos
Table of Contents
MX Linux Users Manual
1 Introduction
1.1 About MX Linux
MX Linux is a special version of antiX developed in full collaboration with the MEPIS Community, using the best tools and talents from each distro. It is a midweight OS designed to combine an elegant and efficient desktop with simple configuration, high stability, solid performance and medium-sized footprint. It deploys Xfce 4.12 as Desktop Environment on top of a Debian Stable base; ongoing backports to the Community Repos keep it current.
The amount and size of applications have been restricted both to reduce download size and to limit the need to remove unwanted packages; one-click installation of many popular additional packages is available in the MX Package Installer.
Although antiX is its “code-parent,” MX Linux comes with a distinct set of applications and procedures that in many instances differ completely. It relies on the excellent upstream work by Linux, Debian, and Xfce. It also incorporates the independent and innovative development products smxi and inxi.
The following Development Team members (devs AT mxlinux DOT org) played a particularly significant role in the creation of MX Linux.
- Lead Developer: anticapitalista
- Primary Coders/Packagers: Adrian, BitJam, kmathern, Stevo, timkb4cq
- Project Manager: jerry3904
- Significant contributors: chrispop99, Dolphin_Oracle, Eadwine Rose, fu-sen, Gaer Boy, Ko, m_pav, megatotoro, namida12, pcallahan80, richb, Utopia, zeeone
Special thanks for strong ongoing support of this project go to the Mepis Community Packagers; to video producers Dolphin_Oracle and m_pav; to our volunteers, especially Gordon Cooper, mikeinsantarosa and Old Giza; and to all our Translators!
1.2 About this Manual

Figure 1-1: The *need* for manuals (xkcd.com)
This Users Manual is the product of large group of volunteers from the MX Linux community. As such, it will inevitably contain errors and omissions, although we have worked hard to minimize them. Please send us corrections or suggestions using one of the methods listed at the beginning. Updates will occur online on a regular basis; the backup copy on the hard drive (/usr/local/share/doc/mxum.html) will be updated less often through the standard package procedures.
The Manual is designed to walk new users through the steps of obtaining a copy of MX Linux, installing it, configuring it to work with one’s own hardware, and putting it to daily use. It aims to provide a readable general introduction, and purposely gives preference to graphical tools when available. For detailed or infrequent topics, the user should consult the Resources or post on the Forum.
New users may find some of the terms used in this Manual to be unfamiliar or confusing. We have tried to limit the use of difficult terms and concepts, but some are simply unavoidable. The Glossary located at the end of the document provides definitions and comments that will help in getting through difficult passages.
All content is © 2015 by antiX Linux and released under GPLv3. Citation should read:
MX Linux Community Documentation Project. 2015. Users Manual for MX Linux.
1.3 System requirements
For an MX Linux system installed on a harddrive, you would normally need the following components. (See also LiveMedium options in Section 6.6.)
Minimum
- A CD/DVD drive (and BIOS capable of booting from that drive), or a live USB (and BIOS capable of booting from USB)
- A modern i486 Intel or AMD processor
- 512 MB of memory
- 5 GB free hard drive space
- A SoundBlaster, AC97 or HDA-compatible sound card.
Recommended
- A CD/DVD drive (and BIOS capable of booting from that drive), or a live USB (and BIOS capable of booting from USB)
- A modern i686 Intel or AMD processor
- 1 GB RAM or more
- At least 10 GB free hard drive space
- A 3D-capable video card for 3D desktop support
1.4 Support
What kind of support is available for MX Linux? The answer to this question depends on the type of support you mean:
- User-based problems. A raft of support mechanisms exists for MX Linux, from documents and videos to forums and search engines. See the Community Support page for details.
- Hardware. Hardware is supported in the kernel, where continuous development goes on. Very new hardware may not yet be supported, and very old hardware, though still supported, may no longer be sufficient for the demands of the desktop and applications.
- Desktop. Xfce4 is a mature desktop that remains under development. The version shipped with MX Linux is considered stable; important updates will be applied as they become available.
- Applications. Applications continue to be developed after the release of any version of MX Linux, meaning that the shipped versions will get older as time passes. This problem is addressed through a combination of sources: Debian, individual Developers including MX Devs, and the Community Packaging Team.
- Security. Security updates from Debian will cover MX Linux users well into the foreseeable future.
1.5 Bugs, issues and requests
Bugs are errors in a computer program or system that produce incorrect results or abnormal behavior. MX Linux defines “issues” as upstream bugs about which the Dev Team can do nothing. Finally, “requests” are additions requested by users, either as new applications or new features for existing applications. MX Linux deals with these in the following manner:
- All three of these are managed by means of the Tracker.
- Users should make a post in the Bugs and Request Forum, being careful to provide information about hardware, system, and error details
- Devs as well as Community members will respond to those posts with questions, suggestions, etc.
- If Devs conclude that a legitimate bug/issue/request is involved, they create a new entry in Tracker.
- Users can consult Tracker to monitor progress on their post
Figure 1-2: Tracker
2 Installation
2.1 Introduction
An MX Linux LiveMedium (USB or CD) boots your computer without accessing the hard disk. It copies a virtual file system into RAM that acts as the center of a temporary operating system for the computer. When you end your Live session, everything about your computer is back to the way it was, unchanged (contrast Section 6.6.1).
This provides a number of benefits:
- It enables you to run MX Linux on your computer without installing it.
- It allows you to determine whether MX Linux is compatible with your hardware.
- It helps you to get a feel for how MX Linux works and to explore some of its features.
- You can decide whether MX Linux is what you want without permanently affecting your current system.
Running from the LiveMedium also has some disadvantages if using a Live CD:
- Because the entire system is operating from a combination of RAM and the medium, MX Linux will require more RAM and run more slowly than if it were installed on the hard drive.
- Some unusual hardware that requires specialized drivers or custom configuration may not work in a LiveMedium session where permanent files can’t be installed. Installing and removing software is also not possible because the CD is a read-only medium.
2.1.1 PAE or non-PAE?
MX Linux is available in two modes for 32bit architecture: PAE and non-PAE. PAE stands for Physical Address Extension, a way of allowing 32 bit operating systems to access ram beyond around 4GB. It is possible to use a non-PAE version on a PAE system, but not vice versa. MX Linux non-PAE is exactly the same as MX-14 PAE except it uses:
- the 486 kernel instead of the 686 one
- an older version of Flash by default
The method you use to determine whether you need the PAE or non-PAE version depends on the OS you currently run.
- Linux. Open a terminal and enter this command (install inxi first if necessary): inxi -f. If the CPU Flags entry does not include PAE in the list, then you’ll need the non-PAE version.
- Mac. Intel versions of OS X support PAE.
-
Windows®
- Windows2000 and earlier: non-PAE
- Windows XP and Vista. Right click My Computer > Properties, General tab. If it says Physical Address Extension (=PAE) at the bottom, then PAE is the correct version to install.
-
Windows 7. Open the Command Prompt window by clicking the Start button > All Programs > Accessories > Command Prompt. A terminal window will appear. Enter this code at the command prompt where the cursor is positioned: wmic os get PAEEnabledIf PAE is enabled, you will get a return like this: PAEEnabled. That return may or may not be followed by the word TRUE.
- Windows 8. PAE enabled by default.
2.2 Creating a bootable medium
2.2.1 Obtain the ISO
MX Linux is distributed as an ISO, a disk image file in the ISO 9660 file system format. It is available in two formats off the Download page.
-
The original release of a given version.
- This is a static version that, once released, remains unaltered.
- The longer the time since release, the less current it is.
-
A monthly update of a given version. This monthly ISO (both PAE and NON-PAE) is created from the original release using MX Snapshot (see Section 6.6.2).
- It includes all upgrades since the original release, and thus removes the necessity of downloading a large number of files after installation.
- It also enables users to run Live with the most recent version of the programs.
- Not guaranteed to fit on a CD, as upgrades may have changed ISO size.
- Only available as direct download!
It is possible to purchase a CD or USB (original release only) from OSDisk with the ISO already loaded and ready to use: use the links on the Download page. MX Linux receives a small amount back from each purchase that it uses to cover costs.
MX Linux can be downloaded in two ways from the Download page.
- Direct. Click on the correct link for your architecture and mode, and save the ISO to your Hard Disk. Available for both original release and monthly update.
-
Torrent. BitTorrent file sharing provides an internet protocol for efficient mass transfer of data. It decentralizes the transfer in such a way as to utilize good bandwidth connections and to minimize strain on low-bandwidth connections. An added benefit is all BitTorrent clients perform error checking during the download process, so there is no need to do a separate md5sum check after your download is complete. It has already been done! The MX Linux Torrent Team maintains a seeded BitTorrent swarm of the latest MX Linux ISO (original release only), registered at LinuxTracker.org within 24 hours of its official release. Here are the basic steps:
-
Go to the Download page and click on the correct Torrent link
- When the LinuxTracker page opens, find and click the link for the torrent (e.g., MX-14.3-pae) in the row labeled “Torrent”
- On the next screen, look for the link labeled “Download Now” and click on it
- Make sure “Open with <NameOfYourDefaultTorrentClient>” is selected and click OK
- Your torrent client (Transmission by default) will then show the torrent in its list; highlight it and click Start to begin the download process.

Figure 2-1: LinuxTracker: small link to torrent
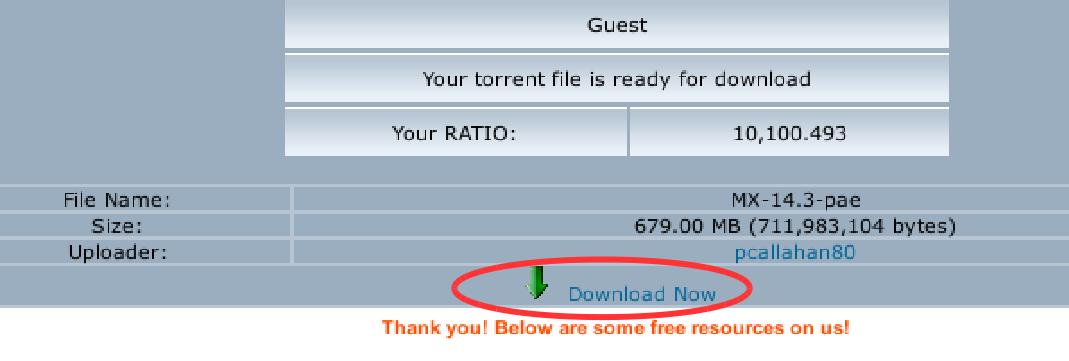
Figure 2-2: LinuxTracker: small download link
2.2.2 Check validity of downloaded ISOs
After you have downloaded an ISO, the next step is to check its md5sum against the official one. It will be identical to the official md5sum if your copy is authentic. The following steps will let you verify the integrity of the downloaded ISO on any OS platform.
Users can check with a tool called WinMD5FREE. Download and unzip it, then put the exe file in any folder on your hard drive. It is ready to use, no installation required.
In MX Linux, navigate to the folder where you have downloaded the ISO and the md5sum file. Right-click the md5sum file > Check data integrity. A dialog box will pop up saying “<name of ISO>: OK” if the numbers are identical. You can also right-click the ISO > Compute md5sum and compare it with another source.
For situations where that option is not available, open a terminal in the location where you downloaded the ISO, then type:
md5sum filename.iso
Be sure to replace “filename” with the actual filename (type in the first couple of letters then hit Tab and it will be filled in automatically).
Compare the number obtained by this calculation with the md5sum file downloaded from official site. If they are identical, your copy is identical to the official release.
Mac users need to open up a console/terminal and change into the directory with the ISO and md5sum files. Then issue this command:
md5 -c filename.md5sum
Be sure to replace filename with the actual filename.
2.2.3 Create the LiveMedium
Burning an ISO to a DVD is easy, as long as you follow some important guidelines.
- Do not burn the ISO onto a blank CD/DVD as if it were a data file! An ISO is formatted and bootable image of an OS. You need to choose Burn disk image or Burn ISO in the menu of your CD/DVD burning program. If you just drag and drop it into a file list and burn it as a regular file, you will not get a bootable LiveMedium.
- Use a good quality writable DVD-R with a 4.7 GB capacity.
You can easily create a bootable USB that works on most systems. MX Linux includes two tools for this work.
-
Unetbootin, a cross-platform utility. If necessary, download and install Unetbootin from the Unetbootin home page.
- Plug in the USB stick you are going to use and reformat it to FAT32 using GParted, if not already in that format. On Windows, use the My Computer screen, right-click your USB device in the menu and select Format, then FAT 32.
- Start Unetbootin, and either download the ISO using the top radio button, or click on the button with the 3 dots to locate your ISO file.
- Make sure the device that is identified in the bottom line is what you want to use and that there are no files on it that you do not want destroyed.
- Click OK to create the files necessary (it will take some time) on the USB device.
- Either click to restart the system, or exit to reboot manually.
- antix2usb: see Section 6.6.3.
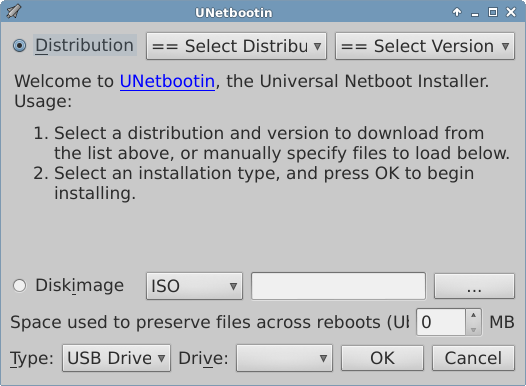
Figure 2-3: Unetbootin
2.3 Pre-Installation
2.3.1 Coming from Windows
If you are going to install MX Linux as a replacement for Microsoft Windows, it is a good idea to consolidate and back up your files and other data currently stored in Windows. Even if you are planning to dual-boot, you should make a backup of this data in case of unforeseen problems during the install.
Locate all of your files, such as office documents, pictures, video, or music:
- Typically, most of these are located in My Documents folder.
- Search from the Windows start menu for various types of files to make sure you have found and saved them all.
- Once you have located all such files, burn them to a CD or DVD, or copy them to an external device such as a USB thumb drive.
Depending on the email or calendar program you use, your email and calendar data may not be saved in an obvious location or under an obvious file name. Most email or scheduling applications (such as Microsoft Outlook®) are able to export this data in one or more file formats. Consult your application’s help documentation to find out how to export the data.
- Email data: The safest format for email is plain text, since most mail programs support this feature; be sure to zip the file to ensure that its contents are included. If you are using Outlook Express, your mail is stored in a .dbx or .mbx file, either of which can be imported into Thunderbird (if installed) on MX Linux. Use the Windows search feature to locate this file and copy it to your backup. Outlook mail should be imported first into Outlook Express before being exported for use in MX Linux.
- Calendar data: export your calendar data to iCalendar or vCalendar format if you wish to use it in MX Linux.
- Contact data: the most universal formats are CSV (comma separated values) or vCard.
Although not usually stored in readable files that can be backed up, it’s important to remember to make note of various account information you may have saved in your computer. Your automatic log-in data for websites or services like your ISP will have to be entered in all over again, so make sure to store off disk the information you need to access these services again. Examples include:
- ISP login information: You will need at least your username and password for your internet service provider, and the phone number to connect if you are on dial-up or ISDN. Other details might include a dial out number, dialing type (pulse or tone), and authentication type (for dialup); IP address and subnet mask, DNS server, gateway IP address, DHCP server, VPI/VCI, MTU, Encapsulation type, or DHCP settings (for various forms of broadband). If you are not sure what you need, consult your ISP.
- Wireless networking: You will need your passkey or passphrase, and network name.
- Web passwords: You will need your passwords to various web forums, online stores, or other secured sites.
- Email account details: You will need your username and password, and the addresses or URLs of the mail servers. You may also need the authentication type. This information should be retrievable from the Account settings dialog of your email client.
- Instant messaging: Your username and password for your IM account(s), your buddy list, and the server connection information if necessary.
- Other: If you have a VPN connection (such as to your office), a proxy server, or other configured network service, make sure you find out what information is necessary to reconfigure it in the event that you need to.
Web browser favorites (bookmarks) are often overlooked during a backup, and they are not usually stored in a conspicuous place. Most browsers contain a utility to export your bookmarks to a file, which can then be imported into the web browser of your choice in MX Linux. Here are some export methods for common web browsers:
- Internet Explorer®: click File > import and export, select export favorites, select the favorites folder (to export all favorites), select export to file or address and enter a filename for the favorites.
- Firefox® 3 and above: click Bookmarks > Organize Bookmarks or Show All Bookmarks, highlight the bookmark folder to backup, click Import and Backup - Export HTML..., enter a filename for the bookmarks.
Many proprietary programs for Windows are not installable without a license key or CD key. Unless you are set on doing away with Windows permanently, make sure you have a license key for any program that requires it. If you do decide to reinstall Windows (or if dual-boot setup goes awry), you will be unable to reinstall these programs without the key.
If you cannot find the paper license that came with your product, you may be able to locate it in the Windows registry, or use a keyfinder such as ProduKey. If all else fails, try contacting the computer’s manufacture for help.
Windows programs will not run inside a Linux OS, and MX Linux users are encouraged to look for native equivalents (see Section 4). Applications that are critical for a user may run under Wine (see Section 6.1), though it varies somewhat.
2.3.2 Apple Intel computers
Installing MX Linux on Apple computers with Intel chips is generally problematic, though the situation varies to a certain degree with the exact hardware involved. Users interested in the question are advised to consult the Debian materials and forums for recent developments.
2.3.3 Harddrive FAQs
Before starting the install, you need to decide where you are going to install MX Linux.
- Entire harddrive
- Existing partition on a harddrive
- New partition on a harddrive
You can simply select one of the first two during installation, but the third requires the creation of a new partition. You can do this during installation, but it is recommended that you do that before you start the installation. In either case, you will be using GParted, a useful and very powerful tool.
MORE: GParted Manual
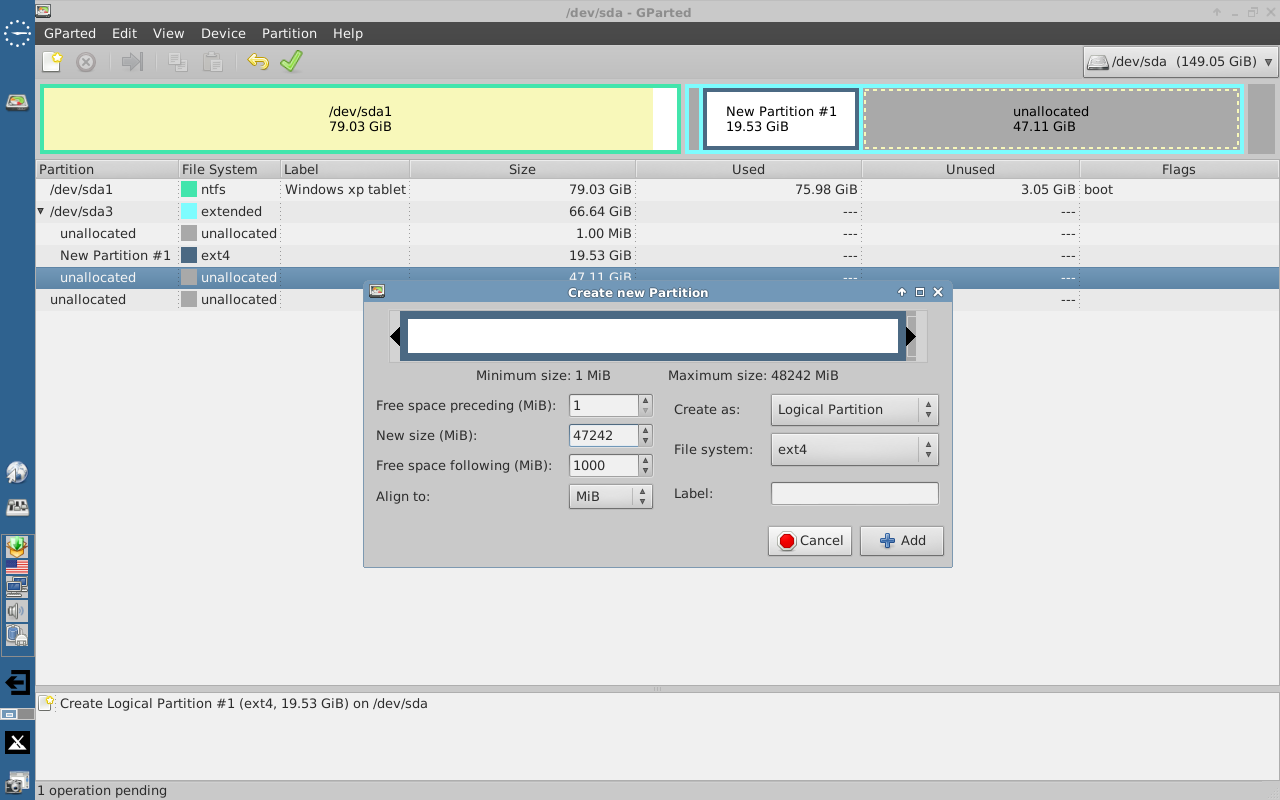
Figure 2-4: Creating a new partition with Gparted
A very handy tool for such actions is Start menu > System > Disk manager. This utility provides a graphical presentation of all the partitions on the machine (excluding swap) with a simple interface for quickly and easily mounting, unmounting and editing some properties of disk partitions. Changes are automatically and immediately written to /etc/fstab and are thus preserved for the next boot.
Disk Manager automatically allocates mount points in /media, using /media/LABEL (e.g., /media/HomeData) if the partition is labeled or /media/DEVICE (e.g., /media/cdrom) if not. These mount points are created by DM when a partition is mounted, and removed immediately when a partition is unmounted.
HELP: here.
Recent home computers with Windows are sold with a diagnostic partition and restore partition, in addition to the one that contains the OS installation. If you see multiple partitions showing up in GParted that you were not aware of, they are probably those and should be left alone.
You do not have to create a separate home, since the Installer will creat a /home partition within / (root). But having it separate makes upgrades easier and protects against problems caused by users filling up the drive with a lot of pictures, music, or video data.
- The installed base size is a little under 2.5GB, so we recommend a minimum of 5GB to allow for basic functions.
- This minimum size will not allow you to install many programs, and may cause difficulty doing upgrades, running VirtualBox, etc. Recommended size for normal use is therefore 10 GB.
- If you have /home located within / and store a lot of big files, then you will need a larger root partition.
- Gamers playing big games (e.g., Wesnoth) should note that they will need a bigger / partition than usual for data, images, sound files; an alternative is to use a separate Data drive.
The Installer will create a SWAP file for you (see Section 2.5.1). If you intend to hibernate (and not just suspend) the system, swap may need to be something on the order of 2GB or else the hibernation will fail when the current memory use is more than 1GB.
Before you begin installation, it is critical that you understand how Linux operating systems treat hard drives and their partitions.
- Drive names. Unlike Windows, which assigns a drive letter to each of your hard drive partitions, Linux assigns a short device name to each hard drive or other storage device on a system. The device names always start with sd plus a single letter. For instance, the first drive on your system will be sda, the second sdb, etc. There are also more advanced means of naming drives, the most common of which is the UUID (Universally Unique IDentifier), used to assign a permanent name that will not be changed by the addition or removal of equipment.
- Partition names. Within each drive every partition is referred to as a number appended to the device name. Thus, for instance, sda1 would be the first partition on the first hard drive, while sdb3 would be the third partition on the second drive.
- Extended partitions. PC hard disks were originally permitted only four partitions. These are called primary partitions in Linux and are numbered 1 to 4. You can increase the number by making one of the primary partitions into an extended partition, then dividing that into logical partitions (limit 15) that are numbered from 5 onward. Linux can be installed into a primary or logical partition.
2.4 First look
2.4.1 Boot the LiveMedium
Simply place the DVD in the tray and reboot.
You may need to take a few steps to get your computer to boot correctly using the USB.
- To boot with the USB Drive, many computers have special keys you can press during booting which allow you to choose that device. Typical Boot Device Menu keys are Esc or one of the Function keys. Look carefully at the first screen that shows up when rebooting to find the correct key.
-
Alternatively, You may have to go into the BIOS to change the boot device order:
- Boot the computer, and hit the required key (e.g., F2, F10 or Esc) at the beginning to get into the BIOS
- Click on (or arrow over to) the Boot tab
- Identify and highlight your USB device (usually, USB HDD), then move it to the top of the list. Save and exit
- If unsure or uncomfortable about changing the BIOS, ask for assistance in the Forums.
- On older computers without USB support in the BIOS, you can use the Plop Linux LiveCD that will load USB drivers and present you with a menu. See the website for details.
Once your system is set to recognize the USB Drive during the boot process, just plug in the Drive and reboot the machine.
Occasionally it may happen that when you boot up with the LiveMedium, you end up looking at an empty black screen that may have a blinking cursor in the corner. This represents a failure to start X, the windows system used by Linux. Possibilities and solutions for this failure include the following.
- Reboot and press F5, then select vesa, a generic video driver that provides basic functionality for most video cards.
- If monitor uses nVidia, ATI or fglrx drivers, then Ctrl-Alt-F1 should get you to a command line, where you can login as regular user, then become root and run sgfxi (see below).
- Incorrect resolution. Normally, the resolution is configured automatically, but it can fail. Reboot and press F7 to correct.
- Kernel modeset issues. Add the cheat code nomodeset (see the MX/antiX Wiki).
2.4.2 The opening screen

Figure 2-5: LiveMedium boot screen (MX-14.3)
When the LiveMedium boots up, you will be presented with a screen with a number of vertical entries, below which is a row of horizontal options. (The installed screen looks quite different.)
Table 1: Menu entries in Live boot
| Entry | Comment |
| MX-<VERSION> (<RELEASE DATE>) | This entry is selected by default, and is the standard way that most users will boot the Live system. Simply press Return to boot the system. |
| Frugal Install | Run MX LInux as a persistent live iso on a hard drive. See the MX/antiX Wiki for details. |
| Command Line Install | Boots directly to the command line. Does not start X-windows. This can be useful to install on systems with very limited RAM. |
| Root Persistence | Enables root persistence so a LiveUSB acts like an installed system. Will prompt for creation of persistence files if not already available. |
| Static Root Persistence | Just like root persistence but changes are saved immediate to disk instead of being stored in RAM. Will prompt for creation of persistence files if not already available. |
| Home Persistence | Only enables home persistence. This saves files and settings in your home directory but does not save system-wide settings and packages that have been installed. Will prompt for creation of persistence files if not already available. |
| Boot from Hard Drive | Boots from the first internal hard drive. |
| Memory Test (memtest86+) | Runs a test to check RAM. If this test passes then there may still be a hardware problem or even a problem with RAM but if the test fails then you know something is wrong. |
Custom entries may also appear in the main menu.
- F1 Help. Help system in English only. Contains much of the same information that is given here.
- F2 Language. Set the language for the bootloader and the MX system. This will automatically transfer to the hard drive when you install.
- F3 Time Zone. Set the timezone for the system. This will automatically transfer to the hard drive when you install.
-
F4 Options. Options for checking and booting the Live system. Most of these options do not transfer to the hard drive when you install.
- check md5: check the integrity of the Live media.
- check fs (LiveUSB only): check the file system(s) of the boot media.
- toram: transfer the Live system to RAM for faster operation.
- no usb-2: can help to boot LiveUSB on some older system.
- no acpi: can help to boot LiveCD and LiveUSB on some older systems. This options transfers when you install.
- HP Laptop: enable control of screen backlight on some HP laptop systems. This option transfers when you install.
-
F5 Video Mode. These options can help when you have trouble getting X-windows to work. They can also help if the screen suddenly goes blank or loses sync early in the boot process which can be caused by a problem with Kernel Mode Setting (KMS). These options will transfer when you install.
- vesa: this is the safest boot mode available. It disables Kernel Mode Setting and forces use of the vesa driver which works with almost all hardware. Do not expect great graphics performance.
- safe: disable Kernel Mode Setting but allow the system to select a hardware specific graphics driver.
- F6 Console. Set resolution of virtual consoles. May conflict with Kernel Mode Setting. Can be useful if you are booting into Command Line Install or if you are trying to debug the early boot process. This option will transfer when you install.
- F7 DPI (LiveCD/DVD). Set the dots-per-inch in X-windows. This will scale the font sizes. The larger the DPI, the larger the fonts will be. This setting will transfer when you install.
-
F7 Save (LiveUSB). This can save all your menu selections and typed-in boot parameters as the new defaults. It is a very easy way to quickly customize a LiveUSB for language and timezone.
- menus: use the current menu selections as the defaults.
- custom: create a new main menu entry using any boot codes you have entered manually. If you don’t enter any boot codes then an custom entry won’t be made.
- both: use the current menu selections as the defaults and also create a custom main menu entry.
- reset: remove any custom main menu entry and restore the original menu defaults.
MORE: Linux startup process
2.4.3 The desktop
The desktop is created and managed by Xfce 4.12, and its appearance and arrangement have been heavily modified for MX Linux.
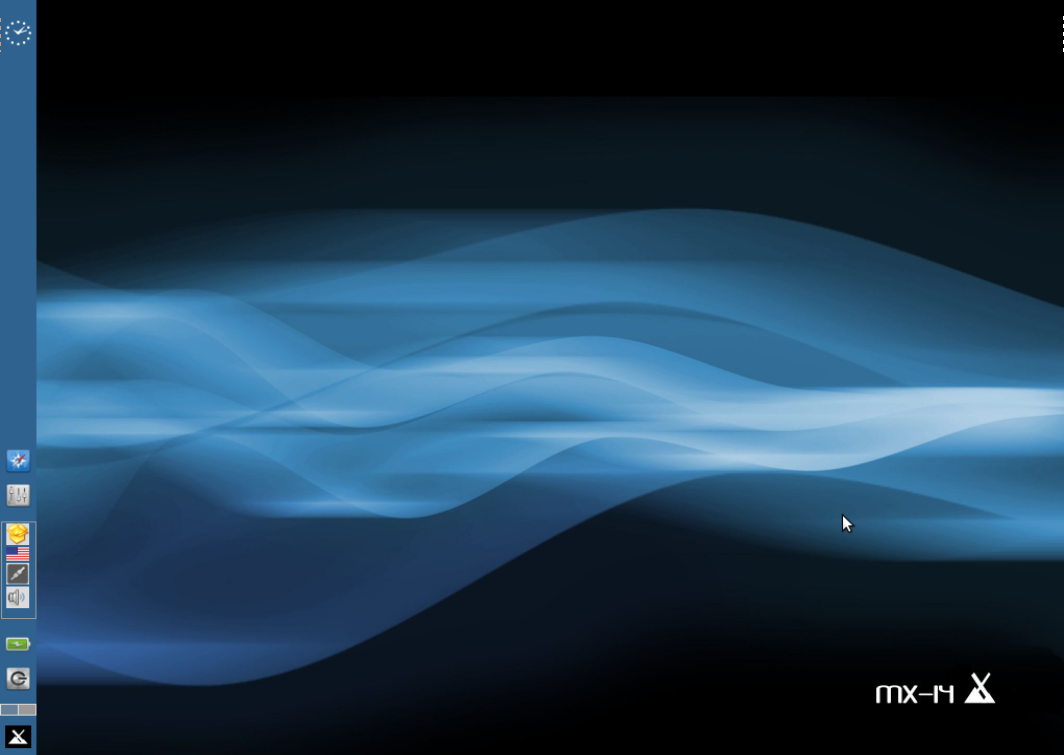
Figure 2-6: Default desktop
The default desktop of MX-14 has a single vertical panel on the left side of the screen. Default panel elements from top to bottom:
- Clock in analog format (double-click for orage calendar)
- Window Buttons: area where open applications are shown
- Web browser
- Settings manager
-
Notification Area
- Update manager
- Keyboard manager
- Network manager
- Volume manager
- Other applications may insert icons here when running.
- Power manager
- Log out button.
- Pager: displays available workspaces
- Start (“Whisker”) menu
To change the default Panel, see Section 3.8.
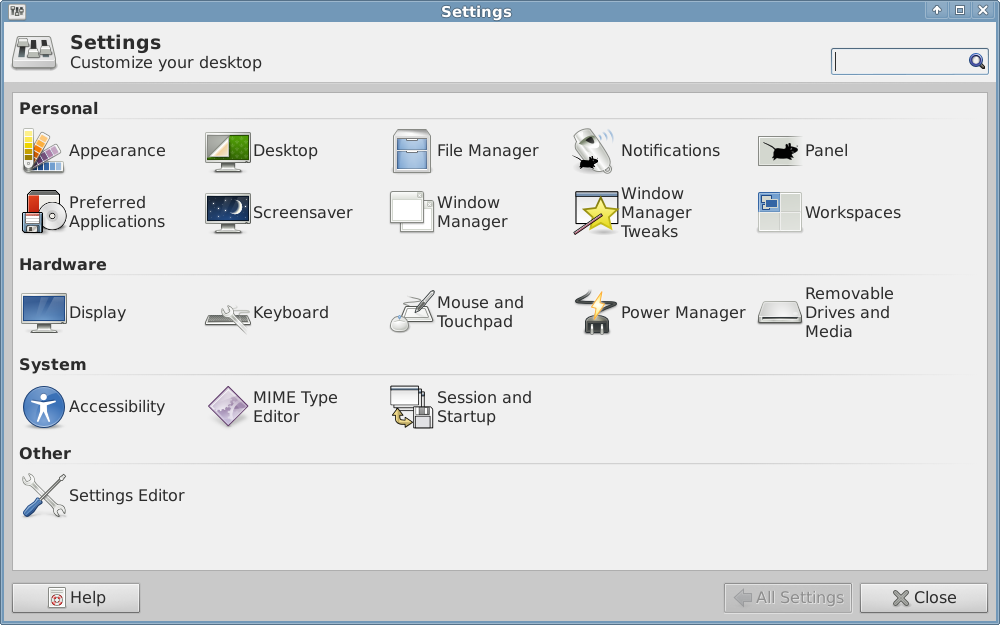
Figure 2-7: Settings Manager
Some handy things to know at the beginning:
- If you are having problems with sound, network, etc., see Section 3.
- If you need root privileges when running Live, the password is root (if in a terminal, first enter the username su)
- Adjust sound general loudness by right-clicking speaker icon > Open Mixer.
- Set the system to your particular keyboard layout by clicking Start menu > Settings > Keyboard, Layout tab, and selecting the model with the pull-down menu.
- Adjust preferences for mouse or touchpad by clicking Start menu > Settings > Mouse and Touchpad.
- Exit the session by clicking on the exit button above the Start menu icon.
- Trash can be easily managed in the File Manager (Thunar), where you will see its icon in the left pane. Right-click to empty. It can also be added to the Desktop or Panel.
- Keep your system current by watching for the green indicator of available updates on the Update Manager (Apt-Notifier) icon. See Section 3.2.1 for details.
- Handy key combinations (see also Settings Manager > Keyboard > Application Shortcuts).
Table 2: Handy key combinations
| Keystrokes | Action |
| Ctrl-Alt-Esc | Changes the cursor into a white x to kill any program |
| Ctrl-Alt-Bksp | Closes the session and returns you to the login screen |
| Ctrl-Alt-F1 | Drops you out of your X session to a command line; use Ctrl-Alt-F7 to return. |
| Alt-F1 | Opens this MX Linux Users Manual |
| Alt-F2 | Brings up a dialog box to run an application |
| Alt-F3 | Opens the Application Finder which also allows editing menu entries |
| Alt-F4 | Closes an application that is in focus |
| PrtScr | Opens the Screenshooter for screen captures |
Applications can be started in various ways.
-
Click the Start menu (Whisker) icon, in lower left corner of default desktop.
- It opens to Favorites category, and you can hover mouse over other categories on right side to see contents in the left pane.
- At the top is a powerful incremental search box: just type in a few letters to find any application without needing to know its category.

Figure 2-8: Whisker menu
- Right-click the desktop > Applications.
-
If you know the name of the application, you can use Application Finder, started easily in one of two ways.
- Right-click the desktop > Run command ...
- Alt-F2
- Once the application has been identified, click on the green down arrow for details and menu editing.

Figure 2-9: Application Finder identifying application
-
Define a keystroke of your own to open a favorite application. For instance, to get a drop-down terminal:
- Click Start menu > Settings, then Keyboard, Application shortcuts tab
- Click Add
- In the Command field of the box that pops up put it: xfce4-terminal --drop-down
- Press the key or key combination you want to use (such as F4)
- Click Close. Now you can use your keystroke as a toggle to show and hide the terminal.
System information
- Click Start menu > System > System Profiler and Benchmark for a nice graphic display
- Open a terminal and enter: inxi -F
- For monitor settings, click Settings Manager icon on Panel > Display
- Make handy quick monitor changes with Start menu> Settings > Monitor Settings
- Sound adjustment is done through Start menu > Multimedia > Audio Mixer (or right-click Volume manager icon)
NOTE: for troubleshooting areas such as display, sound or internet, consult Section 3: Configuration.
2.4.4 Exiting
It is important to exit MX Linux correctly when you have finished your session so that the system can be brought down in a secure way. All running programs are first notified that the system is going down, giving them the time to save any file being edited, exit from mail and news programs, etc. If you just turn the power off, you risk the possibilities of damaging the operating system.
The usual way to exit is to click the Log Out icon above the Pager.
To leave a session for good, select one of the following on the Log Out dialog box:
-
Log out. Choosing this will end everything you are doing, if you have not closed/stopped things yourself, and bring you back to the login screen with the system still running.
- You can also get back to the login screen by clicking Ctrl-Alt-Bksp, but any open programs and processes will not be saved.
- The command at the bottom of the screen, “Save session for future logins,” is checked by default. Its task is to save the state of your desktop (opened applications and their location) and restore it during the next startup. If you have had problems with your desktop function, you can uncheck this to get a fresh start; if that does not solve the problem, click Settings manager > Session and Startup, Session tab, and press the Clear saved sessions button.
- Restart or Shut Down. Self-explanatory options that alter the system state itself.
You can temporarily leave your session in one of the following ways:
- Lock screen. This option is easily available from an icon in the top right corner of the Start menu. It protects your Desktop from unauthorized access while you are away by requiring your user password to return to the session.
- Start a parallel session as a different user. This is available from an icon in the top right corner of the Start menu. You choose this to leave your current session where it is and allows a session for a different user to be started.
- Suspend. This option is available from the Log Out dialog box, and places your system into a low-power state. Information on system configuration, open applications, and active files is stored in main memory (RAM ), while most of the system’s other components are turned off. It is very handy and works very well in MX Linux.
2.5 The Installation process
2.5.1 Detailed installation steps
To begin, boot to the LiveMedium and click on the Installer icon in the upper left corner. The installer will open in a two-pane format: installation steps to take in the right pane, Help in the left. The installer is very easy to use with detailed instructions, and a step-by-step video is linked above. We restrict ourselves here to a sequence of images with clarifying comments.

Figure 2-10: Installer Screen 1
Comments
- Use disk. If unsure which is the partition you want, use the names you see in GParted. The disk you select will be examined cursorily for reliability by SMART. If problems are detected, you will see a warning screen. You will need to decide whether to accept that risk and continue, select another disk or terminate the installation. For more information, click Start menu > System > GSmartControl and “Perform tests” on the drive.
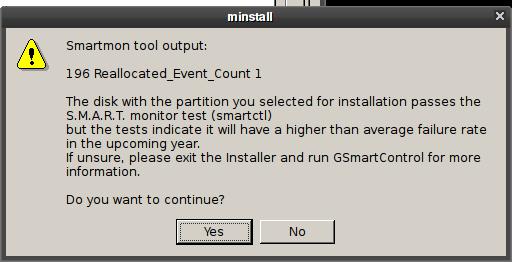
Figure 2-11: SMART warning of risk of failure
- Modify partitions. Most users feel that it is better to carry out any such modifications before you start installation to avoid any problems — for instance newly created partitions may not show up in the drop-down menus. See Section 2.3.2.
- Auto-install using entire disk. Select this option if you plan to use the entire hard drive for MX Linux and you aren’t particular about how the partitions are set up. If you select this, the installer will create a root and swap partition for you using the entire drive. You can optionally specify an amount of space to leave unused, if you plan to create more partitions afterward. Make sure you understand that selecting this option will delete any existing partitions and data. Only choose this if you are not going to keep anything on the selected hard drive.
- Custom install on existing partitions. If you are installing MX Linux to a dual-boot with another operating system, or you wish to define the sizes of your partitions manually, you need to select this option. If you have not previously set up your partitions (see Section 2.3), you may click the button to run GParted at this point and create them. You must have your partitions created before moving on if you want to select this option.
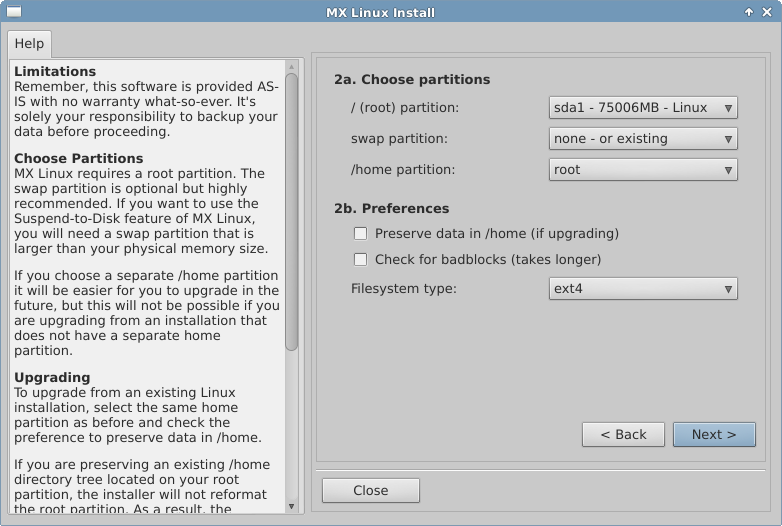
Figure 2-12: Installer Screen 2
Comments
(If you chose Auto-install using entire disk on Screen 1, you will not see this screen.)
-
Choose Partitions. Specify the root and swap partitions you have set up previously; if you set up a separate partition for your home directory, specify it here, otherwise leave /home set to root.
- Note that the /home partition being root means here that the user’s /home folder will be inside the same (root) partition where MX is being installed
- Many users prefer to locate their home directory in a different partition that that of / (root), so that any problem with — or even total replacement of — the installation partition will leave all the user’s individual settings untouched.
-
Preferences.
- Check Preserve data in /home if you are doing an upgrade and already have data in an existing home partition; This option is not generally recommended because of the risk that old configurations will not match the new installation.
- Select Check for badblocks if you want to do a scan for physical defects on the hard drive during formatting. This is recommended for users with older drives.
- Finally, you can optionally select the type of file system you want to use on the hard drive. If you don’t know what to choose here, the default ext4 is recommended in MX Linux.

Figure 2-13: Installer Screen 3
Comments
- Note that the partition shown here (sda1) is just an example; your particular selection of partition may well differ.
- If you have any doubts about that whether you want to destroy all the data on the partition that you see listed in this warning message, click No and then use the Back button to review your choices.

Figure 2-14: Installer Screen 4
Comments
- Most average users will accept the defaults here, which will install the bootloader into the very beginning of the disk. This is the usual location and will cause no harm.
- When you click Next, a pop-up message will check to see that you accept the location of the bootloader.

Figure 2-15: Installer Screen 5
Comments
- Many users choose a unique name for their computer: laptop1, MyBox, StudyDesktop, UTRA, etc. You may also just leave the default name as it is.
- You can just click Next here if you have no computer network.

Figure 2-16: Installer Screen 6
Comments
- The default settings will usually be correct here, as long as you were careful to enter any exceptions at the LiveMedium boot screen.
- The settings can be changed again once you have booted into Xfce with TimeSet, Keyboard, etc.

Figure 2-17: Installer Screen 6 (extra)
Comments
- This screen only shows if “View” was clicked on Screen 6
- Services are applications and functions associated with the kernel that provide capabilities for upper-level processes.
- These applications and functions require time and memory, so if you are concerned about the capacity of your computer, you can look at this list for items that you are sure you do not need. For instance, a user who has no need for Bluetooth (for a mouse or keyboard, for example) can comfortably uncheck that service.
- If you do not understand what a service is and does, you would do best to leave it alone.
- If you later want to change the startup services, a graphical tool called Boot-Up Manager (BUM) is in the repos and makes the job much easier.

Figure 2-18: Installer Screen 7
Comments
- The level of security on the passwords you choose here will depend greatly on the setting of the actual computer. A home desktop is generally less likely to be broken into than a laptop or a computer in a public space.
- If you check Autologin, you will be able to bypass the login screen and speed up the boot process. The downside of that choice is that anyone with some kind of access to your computer would be able to log directly into your account.
- You can transfer changes you make to your Live desktop to the HD installation by checking the last box.
2.6 Troubleshooting
2.6.1 Post-installation boot problems
When rebooting after an installation, it sometimes happens that your computer reports that no operating system or bootable disc was found. It also may not show another installed OS such as Windows. Usually, these problems mean that GRUB did not install properly, but that is easy to correct.
-
If you can boot into at least one partition, open there a root terminal and run this command: update-grub
-
Otherwise, proceed with MX Boot Repair.
- Boot to the LiveMedium.
- Launch MX Tools > Boot Repair.
- Make sure that “Reinstall GRUB Bootloader” is selected, then click OK.
- If this still does not fix it, you may have a faulty hard drive. Usually, you will have seen a SMART warning screen about it when you began your installation.
2.6.2 Locking up
If MX Linux is locking up during installation, it is usually due to a problem with faulty computer hardware, or a bad DVD. If you have determined that the DVD is not the problem, it may be due to faulty RAM, a faulty hard drive, or some other piece of faulty or incompatible hardware.
-
Add one of the Boot Options. The most common problem arises from the graphic driver (MX/antiX Wiki).
- Your DVD drive may be having problems. If your system supports it, create an MX Linux bootable USB flash drive and install from that.
- Systems often lock up due to overheating. Open the computer’s case and ensure that all the system’s fans are running when it is turned on. If your BIOS supports it, check the CPU and Motherboard temperatures and compare them to the temperature specifications for your system.
- Shut down your computer and remove any non-essential hardware, then attempt the installation again. Non-essential hardware may include USB, serial, and parallel-port devices; removable PCI, AGP, PCIE, modem slot, or ISA expansion cards (excluding video, if you do not have onboard video); SCSI devices (unless you are installing to or from one); IDE or SATA devices that you are not installing to or from; joysticks, MIDI cables, audio cables, and any other external multimedia devices.
3 Configuration
This section covers configuration instructions in order to get your system running correctly from a fresh installation of MX Linux, and a short guide to personal customization.
3.1 Peripherals
3.1.1 Smartphone
Sharing files with an Android device.
-
Many phones running Android 4.xx include mtp capability, and you can use the following procedure.
- Connect phone.
- Open Thunar. When the upper left pane (Devices) shows your phone’s name, click on it.
- Navigate to the location you are looking for.
- Phones lacking mtp capability can be accessed via a web browser by installing an app from Google’s Play Store such as AirDroid.
Music files can be viewed and managed using Clementine. Click on Device in the left pane, then double-click CD Drive if necessary.

Figure 3-1: Thunar connected to an Android phone
Through the iPhone 4 series, MX Linux is able to mount an iPhone in Thunar and reveal its contents for manipulation. Since iOS 5.0, iPhones will not allow a Linux installation to be recognized as a “trusted connection,” and users usually turn to a cloud storage service to carry out transfers.
See also Section 4.2.
Open Synaptic and search on blackberry to find the files that need to be installed.
3.1.2 Printer
MX Linux offers two utilities for configuring and managing printers.
-
Print Settings application
- Click Start menu > System > Print Settings
-
CUPS in a browser
- Click Start menu > System > Printers (CUPS)

Figure 3-2: the CUPS adminstration screen for managing printers
Samba on MX-14 allows printing via the network to shared printers on other computers (Windows, Mac, Linux) and NAS (Network Attached Storage) devices offering Samba services. See also Section 3.7 File management.
Using the MX-14 Printing Utility to Set Up Printers
- Click Start menu > System > Print Settings
- Select Server > New> Printer
- Select Network Printer > Windows Printer via SAMBA
- In the dialog window for smb:// enter either servername/printername or server-ipaddress/printername. For example: bigserver/usbprinter1 or 192.168.0.100/printer2
- If you have trouble identifying the server and printer names, click Start menu > System > MX Find Shares for details.
- Leave the button selected for Prompt user if authentication is required, then click Forward
- Leave the button selected for Select printer from database and then click Forward
- Select the driver and then Forward
- Describe Printer if necessary and then Apply
- When the printer appears in the window, right-click Properties > Print Test Page to make sure the connection and driver are operating correctly.
Using the MX-14 Printers (CUPS) Utility to Set Up Printers
- Click Start menu > Printers (CUPS) — Manage Printers in a Browser utility
- Select Adding Printers and Classes > Add Printer
- In the dialog window enter root’s password
- In Add Printer > select appropriate choice (e.g., Windows Printer via SAMBA) > Continue
- In the Connection window, enter smb://servername/printername using same method of finding these names as in Printing utility instructions above > Continue
- Enter printer name and descriptions as you would like...Do not tick Share This Printer > Continue
- Select the printer Make > Continue > Add Printer > choose various options > Set Default Options
- Go to Maintenance > Print Test Page to make sure the connection and driver are operating correctly
Troubleshooting
- There is a troubleshooting utility integrated into the Print Settings application. Click Help > Troubleshoot.
- For HP printers, the extra package hplip-gui will install a useful applet into the Notification Area which provides troubleshooting tools.
- If your printer suddenly stops printing, check that is still enabled by clicking Start menu > System > Print settings, then right-click your printer and enable it again.
3.1.3 Scanner
Scanners are supported in Linux by SANE (Scanner Access Now Easy) which is an application programming interface (API) that provides standardized access to any raster image scanner hardware (flatbed scanner, hand-held scanner, video- and still-cameras, frame-grabbers, etc.).
You can manage your scanner in MX Linux with the default Simple Scan.
- Make sure your scanner is listed as supported by SANE on this list.
3.1.4 Webcam
Most likely your webcam will work in MX Linux. If not, there is a recent detailed discussion of setup in the Arch Wiki.
3.2 Basic MX Apps

Figure 3-3: MX Tools dashboard
A number of applications have been developed specifically for MX Linux to save the user effort with important repetitious tasks often involving unintuitive steps. (Advanced tools are treated in Section 6.6.)
3.2.1 MX Apt-notifier
This extremely handy and versatile applet monitors package updates and notifies you when they are available with a green arrow above the yellow box.

Figure 3-4: View and upgrade screen from MX Apt-notifier
HELP: here.
3.2.2 MX Boot repair
The bootloader is the first software program to run and is responsible for loading and transferring control to the kernel. It sometimes happens that the bootloader on an installation (GRUB2) becomes dysfunctional, usually because the user has made changes of some kind. This tool allows you to restore the bootloader to a functional state.

Figure 3-5: MX Boot Repair main screen
HELP: here.
3.2.3 MX Broadcom Manager
Broadcom chipsets are often difficult to set up, and this application renders the process much easier by detecting hardware and permitting Linux and Windows drivers to be added, removed, and blacklisted.
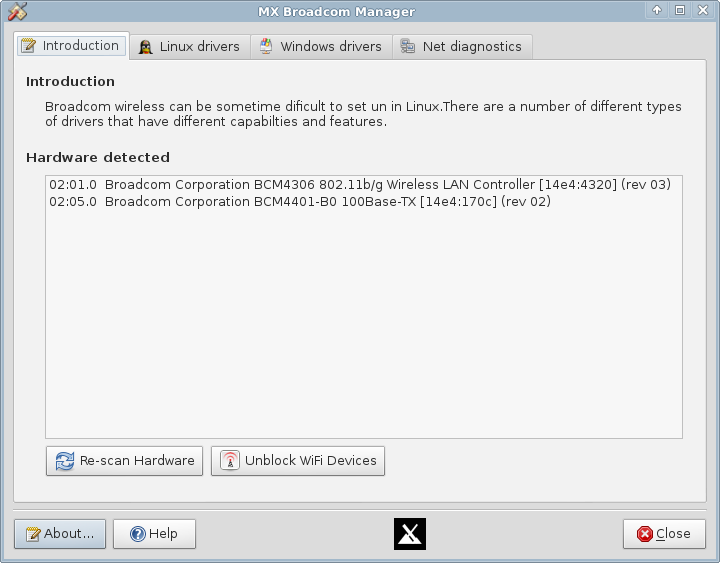
Figure 3-6: MX Broadcom Manager detecting wireless and wired hardware
HELP: here.
3.2.4 MX Check Apt GPG
Apt (Apt-get) includes package authentication in order to improve security. You can still install non-authenticated packages, but you will run into an error: The following signatures couldn’t be verified because the public key is not available. This helpful utility saves carrying out the many steps necessary to obtain that key.

Figure 3-7: Results of checking repo public keys with MX Check Apt GPG
HELP: here.
3.2.5 MX Codecs Installer
A codec is a piece of software that enables encoding/decoding a digital data stream or signal. Most codecs will be installed in MX Linux by multimedia applications such as VLC, but some are restricted.This tool allows easy installation of certain restricted codecs while transferring the responsibility to the user.
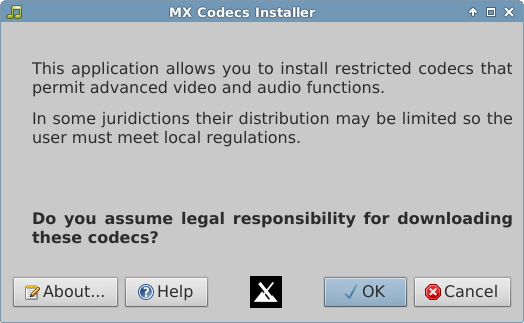
Figure 3-8: MX Codecs installer main screen
HELP: here.
3.2.6 MX Find Shares
This simple but handy utility shows all shares, i.e., computer resources available to a user’s machine.

Figure 3-9: Search results screen of MX Find Shares
HELP: here.
3.2.7 MX Flash Manager
This application facilitates the installation, removal and especially the updating of Flash players.
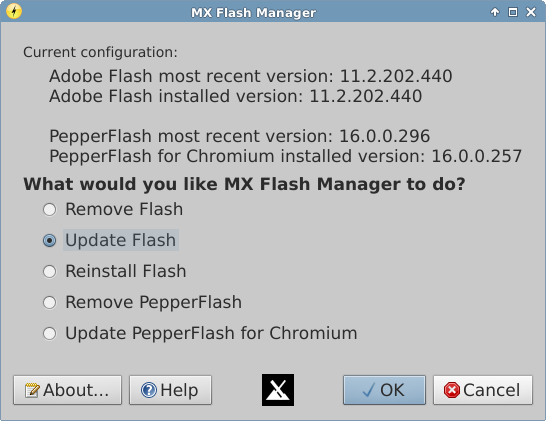
Figure 3-10: MX Flash Manager main screen
HELP: here.
3.2.8 MX Menu Editor
This simple menu editor makes it easy to edit, add or delete menu items. Any edits are saved to the user’s directory /.local/shared/applications/, which takes precedence over the /usr/share/application/ when the Xfce menu gets built during startup.
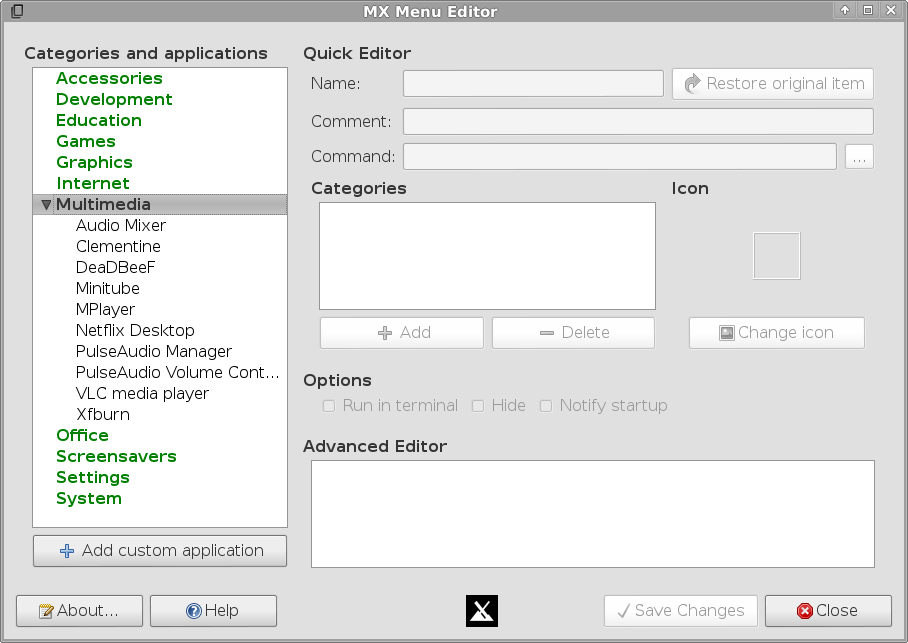
Figure 3-11: MX Menu Editor with the category Multimedia expanded
Note: the MX Menu Editor does not appear on the MX Tools dashboard, so is accessed by clicking Start menu > System > MX Menu Editor.
HELP: here.
3.2.9 MX Package Installer
With this application (originally called metapackage-installer) you can install popular packages in a simplified manner. This ability is particularly useful for MX Linux, since the CD-size limit imposed on the OS restricts the number of applications that can be provided by default. It is also very handy for installing language packs, which can be troublesome to chase down with other methods.
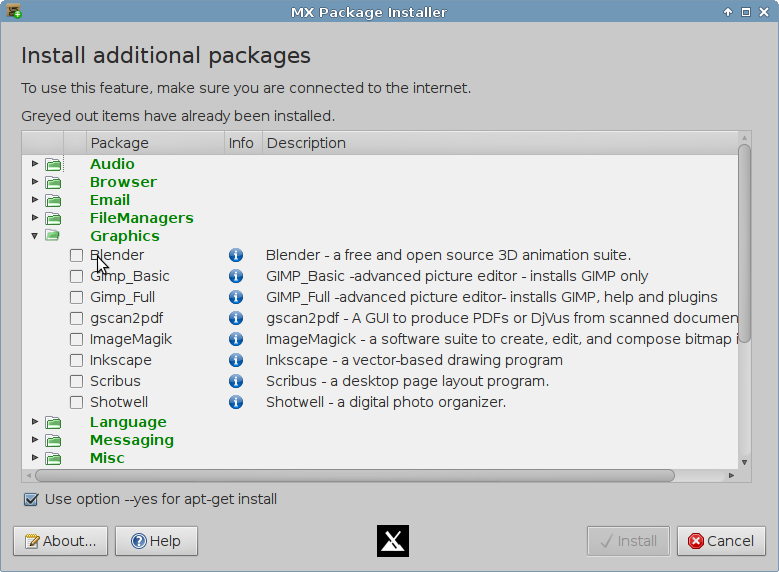
Figure 3-12: MX Package Installer main screen
If you would like to suggest changes in the package list, please post on the MX Forum.
HELP: here.
3.2.10 MX Sound Card
Computers frequently have more than one sound card available. In a common situation, for instance, a separate card may be present for HDMI output. Unless the correct sound card is identified for the system, the user will hear nothing and conclude that sound is not working. This clever little application allows the user to select which sound card should be used by the system, whether in a particular instance or in general.
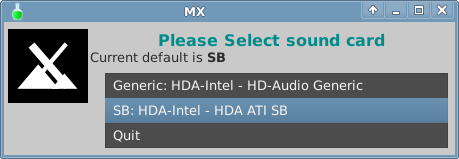
Figure 3-13: Making the selection in Sound Card
HELP: here.
3.2.11 MX Switch User
This tiny but handy tool allows a user to switch out of the current session into a session of another user, without needing to log out and then back in.

Figure 3-14: MX Switch User information screen
HELP: here.
3.2.12 MX User Manager
Everything in Linux runs under a specific user, and each user’s permissions govern whether and how it runs. The superuser (“root”) can create users, give them specific passwords, restrict what they can do, etc. Moreover, each user belongs to one or more groups. New users are automatically added to these groups: lp, dialout, cdrom, floppy, sudo, audio, dip, video, scanner, plugdev, users, fuse, lpadmin and netdev. In addition, some applications when installed (VirtualBox, for example) will create a new usergroup, but may or may not add users to it.
This application aids in adding, editing, removing users and groups in your system.
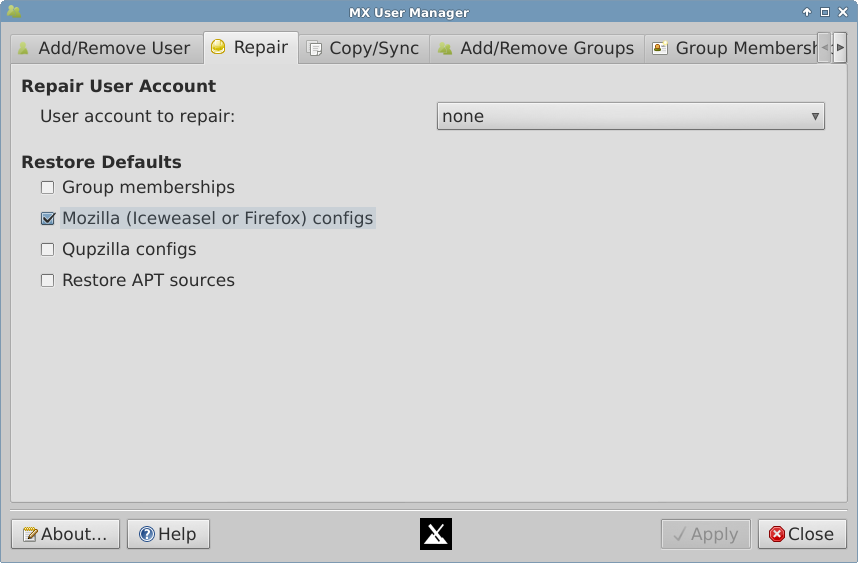
Figure 3-15: MX User Manager repair screen
HELP: here.
3.3 Display
3.3.1 Resolution
Resolution refers to the physical number of columns and rows of pixels creating the display (e.g., 1920x1200). In most cases, the resolution is correctly set by the kernel during installation or when a new monitor is connected. If not, you can change it in the following ways:
- Click Start Menu > Settings > Display. Use the pull-down menus to set the correct values for the monitor you want to adjust.
- For Nvidia cards, you can install the package nvidia-settings that will give you a graphic tool that you can use to alter settings as root with the command: nvidia-settings
- In difficult situations, it is possible to manually alter the configuration file /etc/X11/xorg.conf. Always back up the file before you change it, and check the Forum for help about the use of that file.
3.3.2 Graphic driver
If you are not satisfied with your display’s performance, you may need to upgrade your graphic driver (make sure to first back up the file /etc/X11/xorg.conf, if used) using one of the two following tools (see Section 6.5.2):
- Use sgfxi for ATI, fglrx and Nvidia drivers.
- For legacy Nvidia cards, click Start menu > System > Nvidia_Install.
It is also possible, but more complicated, to download directly from the manufacturer. This method will require you to select and download the correct driver for your system; for system info, open a terminal and enter: lspci│grep VGA.
Here are driver websites for the three most popular brands (do a web search on “<brandname> linux driver” for others):
Intel drivers must be compiled (Section 4.5.2), but Nvidia and ATI drivers are easily installed:
-
Navigate in Thunar to the folder where they were downloaded
- Right-click the file, select the Permissions tab, check Is executable
- Right-click an empty space > Open Terminal here, and type (using the real name of the file): sh filename.run
3.3.3 Fonts
- Click Start Menu > Settings Manager > Appearance, Fonts tab
- Click on the pull-down menu to see the list of fonts and point sizes
- Select the one you want, and click OK

Figure 3-16: Changing font details in Settings Manager
- Some applications may not heed the system-wide font choices.
- Iceweasel: click Edit > Preferences > Content, and make any desired changes.
- Click Start Menu > System > Synaptic Package Manager.
- Use the search function for fonts.
- Select and download the ones you want. The Microsoft core fonts package ttf-mscorefonts-installer provides easy installation of the Microsoft True Type Core Fonts for use with websites and MS applications that run under Wine.
- Extract if necessary, then copy as root (easiest in a root Thunar) the font folder to /usr/share/fonts/.
- Your new fonts should be available in the pull-down menu in Settings manager > Appearance, Fonts tab.
3.3.4 Dual monitors
Multiple monitors are managed in MX Linux with Start menu > Settings > Display. You can use it to adjust resolution, whether one clones the other, which ones will be turned on, etc.

Figure 3-17: Selecting display and resolution in Settings Manager
3.3.5 Power management
Click the Power Manager plugins icon in the Panel. Here you can easily switch to Presentation mode, or go to the Settings to set when a display shuts down, when the computer goes into suspension, the action initiated by closing the lid of a laptop, brightness, etc. On a laptop, battery status and information is displayed and a brightness slider is available.
3.4 Network
Internet connections are handled by Network Manager; click the applet in the Notification Area to see status, connect and explore options.
Right-click the applet > Edit Connections to open up a Settings box with five tabs.
- Wired. In most situations this requires no attention; highlight and click the Edit button for special setups.
-
Wireless
- Network Manager will usually automatically detect your network card and use it to find available access points. In some situations, the command-line tool Ceni in the repos may be helpful.
- For details, see Section 3.4.2 below.
- Mobile Broadband. This tab allows you to use a 3G/4G mobile device for access to the web. Click the Add button to set up.
- VPN. Click the Add button to set up.
- DSL. Click the Add button to set up.
: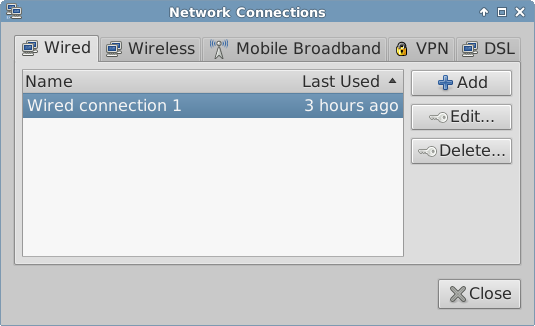

Figure 3-18: Network Manager main screen
3.4.1 Wired access
MX Linux typically picks up wired internet access upon boot without much problem.
MX Linux comes preconfigured for a standard LAN (Local Area Network) that uses DHCP (Dynamic Host Configuration Protocol) to assign IP addresses and DNS (Domain Name System) resolution. This will work in most cases as-is. You can change the configuration with Network Manager.
When you boot MX Linux, your network adapters are assigned a short interface name by udev, the kernel’s device manager. For normal wired adapters this is usually eth0 (with subsequent adapters eth1, eth2, eth3, etc). USB adapters often come up on the eth0 interface in MX Linux, but the interface name can also depend on the adapter’s chipset. For instance, atheros cards often show up as ath0, while ralink usb adapters may be rausb0. For more a detailed list of all found network interfaces, open a terminal, become root, and enter: ifconfig -a.
It is wise to connect to the Internet through a router, as nearly all wired routers contain optional firewalls. In addition, routers use NAT (Network Address Translation) to translate from big Internet addresses to local IP addresses. This affords another layer of protection. Connect to the router directly, or through a hub or switch, and your machine should autoconfigure via DHCP.
The MX 14.3-PAE ISO (but not the non-PAE) contains by mistake a pre-defined network wired interface in /etc/network/interfaces that blocks Network Manager from being able to handle wired connections. Correct the file in the following manner:
- Open Thunar, migrate to /etc/network/
- Right-click the interfaces file > Edit as root
-
The file should only have the following lines:# interfaces(5) file used by ifup(8) and ifdown(8)
auto lo
iface lo inet loopback - If any other lines are present below those, comment them out by putting a hash sign at the beginning
- Save and reboot.
If you use ADSL or PPPoE, connecting to the internet is easy in MX Linux. Right-click the Network Manager icon, then the DSL tab. Click the Add... button and fill in the required information, checking to connect automatically if you want.
NOTE: if you encounter problems when using a USB device to connect, plug the unit into the computer, open a terminal and type:
dmesg | tail
Post a message on Forum with the output to get some help in finding the driver you need.

Figure 3-19: Setting up DSL service
On the Device tab you will need to set up the serial information. Accepting the default /dev/modem may work, but you might need to try another interface. These are the Linux equivalents of the COM ports under MS-DOS and MS-Windows:
Table 3: Linux equivalents for COM ports
| Port | Equivalent |
| COM 1 | /dev/ttyS0 |
| COM 2 | /dev/ttyS1 |
| COM 3 | /dev/ttyS2 |
| COM 4 | /dev/ttyS3 |
3.4.2 Wireless access
MX Linux comes preconfigured to autodetect a WiFi card, and in most cases your card will be found and set up automatically. There are two standard ways wireless can be supported in MX Linux:
- With a native driver that comes as part of the Linux kernel (example: ipw3945 for Intel).
- With a Windows driver using the application Ndiswrapper (available from the repos), which “wraps” your Windows driver so that it can be used in a Linux system (example: bcmwl5 for some Broadcom chipsets). See below for more.
Sometimes there is both a native Linux driver and a Windows driver available. You may want to compare them for speed and connectivity, and you may have to remove the one you are not using to prevent a conflict. Wireless cards can be either internal or external. USB modems (wireless dongles) usually show up on the wlan interface, but if not then check others on the list. NOTE: The successful method varies for users because of the complicated interactions among the Linux kernel, wireless tools, and the local wireless card chipset and router.
Click Start menu > Settings > Network Connections (or just click on the Network Manager icon in the Notification Area), and then the Wireless tab. One of 3 situations will arise.
-
A wireless network has been found.
- Click on the line that gives the name of the network.
- Click Edit in the right panel, and enter your information.
- When done, click OK.
-
The found network does not function after the completion of Step 1.
-
Find out basic information by opening a terminal and entering one at a time:lspcilsusb
-
Become root in that open terminal and enter:iwconfig -aThe output from the first commands (example below) will give you the exact name, model and version (if any) of your wireless chipset, as well as the associated driver and the mac address; from the second, the name of the access point (AP) you are linked to and other connection information.Network
Card-2: Intel Ultimate N WiFi Link 5300 driver: iwlwifi
IF: wlan0 state: up mac: 00:21:6a:81:8c:5a -
Use the information you have gathered in one of the following ways:
-
Do a web search using that information. Some examples using the above lspci output.1) linux Intel Ultimate N WiFi Link 5300 (rev 03)
2) debian stable 00:21:6a:81:8c:5a - Consult the Linux Wireless site below to find out which driver your chipset needs, what conflicts might exist, and whether it needs firmware installed separately.
- Post your information on the Forum and ask for help.
-
Do a web search using that information. Some examples using the above lspci output.
- Sometimes using the terminal application Ceni (in the repos) can reveal hidden access points and other difficult factors. NOTE: using Ceni to configure your network interface in MX Linux will interfere and/or disable management of that interface by the default Network Manager. Ceni stores its configuration info in /etc/network/interfaces. Any interface defined in /etc/network/interfaces will be ignored by Network Manager, as Network Manager assumes that if a definition exists, you want some other application managing the device.
-
Find out basic information by opening a terminal and entering one at a time:
-
No wireless interface is found.
-
Open a terminal and type these commands one at a time: lspcilsusbAlternatively, this command may be used;inxi -n
- Look for the network entry, and note the detailed information on your specific hardware, and look for more information about that from the LinuxWireless site listed below, or ask on the Forum.
-
If you have an external wifi device and no information on a network card is found, unplug the device, wait a few seconds then plug it back in. Open a terminal and enterdmesg | tailExamine the output for information about the device (such as the mac address) that you can use to pursue your issue on the web or the forum.
- Probably the most common example of this situation arising is with the Broadcom wireless chipsets; see the Technical Documentation Wiki.
-
Open a terminal and type these commands one at a time:
For some cards it is necessary to install firmware (for example, firmware-ti-connectivity for Texas Instruments WL1251). MX Linux comes with a good deal of firmware already available, but you may have to track down your particular need, again using the LinuxWireless website linked below.
Ndiswrapper is an open-source software driver “wrapper” that enables the use of Windows drivers for wireless network devices in Linux. It does not come pre-installed in MX Linux, but is in the repos. NOTE: the Windows driver you use must match the OS architecture (e.g., Windows 32-bit driver for MX Linux 32-bit edition). In general, Windows XP drivers are required.
The easiest method of managing Ndiswrapper is to use MX Broadcom Manager (Section 3.2.3). An alternative is to install these two packages from the repos.
- ndisgtk
- ndiswrapper-utils
This will give you a simple graphical method of installing and removing Windows drivers.

Figure 3-20: simple application for managing WIndows wireless drivers
MORE: here.
Wireless security is handled by Network Manager. Here are the basic steps you need to follow:
- Right-click the Network Manager icon in the Notification Area > Edit connections
- Click on the Wireless tab
- Highlight the name of the access point you want to connect to (for example, “linksys” or “starbucks 2345”)
- Click the Edit button and then the Wireless Security tab
- Use the pull-down menu to select the security you want (for example: WPA and WPA2 Personal)
- Enter the password and click Save.
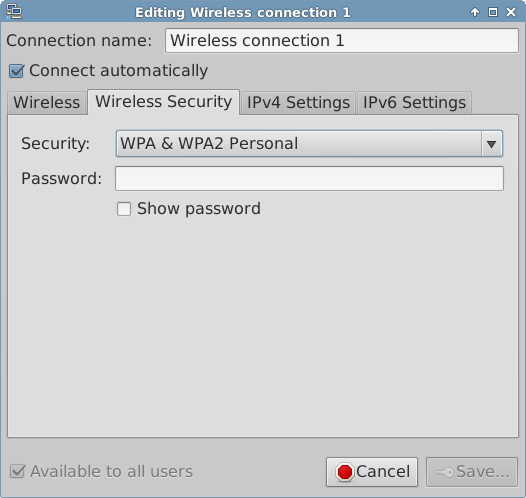
Figure 3-21: Wireless security in Network Manager
It is equally possible to use Ceni to handle wireless security, as long as subsequently you will not be using Network Manager, with which it interferes.
Links
3.4.3 Mobile Broadband
For wireless internet access using a 3G/4G modem, please refer to the Debian Wiki’s 3G pages linked below for compatibility information. Many 3G/4G modems will be recognized on MX Linux by Network Manager.
On some systems, modem connections fail due to an upgrade of the packages udev and libudev1. To solve this, open Synaptic, highlight the packages, and then click Package> Force version... Use the pull-down menu to drop to a lower version and click the Apply icon.
In some cases this solution has not worked consistently for users, but they have found that the complete removal of Network Manager solved the problems.
MORE: Debian Wiki: 3G modem
3.4.4 Command line utilities
Command line utilities are useful for seeing detailed information, and are also commonly used in troubleshooting. Detailed documentation available in the man pages. The most common ones below must be run as root.
Table 4: Wireless utilities
| Command | Comment |
| ifconfig | Main configuration utility for network interfaces. |
| ifup <interface> |
Brings up the specified interface. For example:
ifup eth0 will bring up the ethernet port eth0
|
| ifdown <interface> | The opposite of ifup |
| iwconfig | Wireless network connection utility. Used by itself, displays wireless status. Can be applied to a specific interface, e.g. to select a particular access point |
| rfkill | Disable softblock for wireless network interfaces (e.g., wlan). |
| depmod -a | Probes all modules and, if they have changed, enables new configuration. |
3.5 File management
File management in MX-14 is carried out through Thunar, a fast and powerful tool. Much of its basic use is self-evident, but here are good things to know:
- Hidden files are out of sight by default, but can be made visible via the menu (View > Show Hidden Files) or by pressing Ctrl-H
- The Side Pane can be hidden, and directory (folder) shortcuts can be placed there by right-clicking > Send To
- The context menu has been populated with common actions that vary by what is present or under focus.
- Root action is available via the context menu to open a terminal, edit as root, or open an instance of Thunar with root privileges.
- Thunar easily handles FTP transfers, see below.
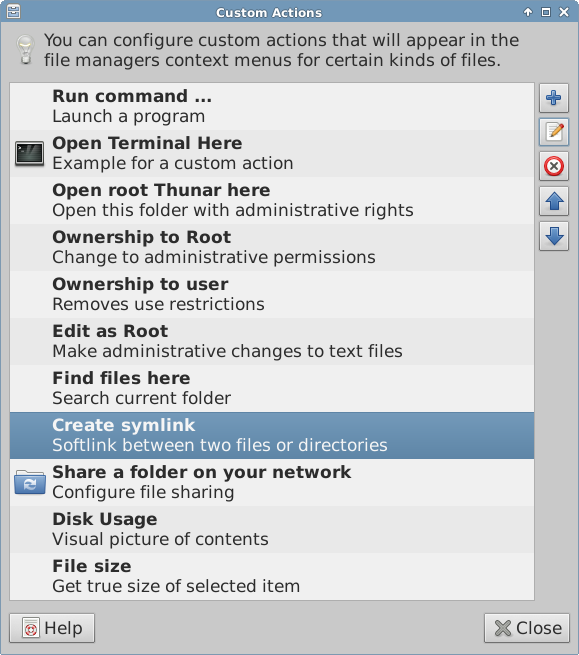
Figure 3-22: Custom actions set up in Thunar
3.5.1 Tips and Tricks
- When working in a directory that requires superuser privileges, you can right-click > Open root Thunar here.
- You can set up tabs with File > New Tab (or Ctrl-T), then move items from one location to another by dragging them to a tab and releasing it.
- Actions listed in the context menu can be edited/deleted, and new ones added, by clicking Edit > Configure custom actions...
- Various options and hidden commands are also visible, see Links below.
- Compressed files can be managed by a right-click on the file. The archiver working in the background is file-roller (Start menu > Accessories > Archive Manager).
- To find files, open Thunar and right-click any folder > Find files here. A dialog box will pop up to give you options. Running in the background is catfish (Start menu > Accessories > Catfish).
- To set up a soft link (AKA symlink), right-click the target (file or folder you want the link to point to) > Create symlink. Then right-click the new symlink, cut it and paste it to where you want it.
3.5.2 FTP
The File Sharing Protocol (FTP) is used to transfer files from one host to another host over a network.
- Open Thunar and click on the Browse Network icon in the left pane
- In the address field, type the server name with the ftp:// prefix. For example, to reach the MX documentation (if you have permission) you would enter this address: ftp://mepiscommunity.org
- Up pops an authorization dialog box. Fill in username and password, and let it save password if you are comfortable with that.
- That’s it. Once you have navigated to the folder you are always going to use, you can right-click the folder > Send to > Side Pane to create a very simple way to connect.
For a discussion of how FTP works, see this page.
3.5.3 File sharing
There are various possibilities to share files between computers or between a computer and a device
- Samba. SAMBA is the most complete solution to share files with Windows machines on your network without making changes to the Windows machines. SAMBA can also be used by many network media players and Network-attached storage (NAS)] devices. SAMBA offers some other services for interfacing with Windows networks, such as domain authentication, messaging services, and netbios name resolution. For details, see below.
- NFS. This is the standard Unix protocol for sharing files. Many feel it is better than Samba for sharing files, and it can be used with Windows (2000 & XP) machines if you install “Services for Unix” or a third-party NFS client on them. Details: see MX/antiX Wiki.
- Bluetooth: For file exchange, install blueman from the repos, reboot, pair with the device, then right-click the bluetooth icon in the Notification Area > Send Files to Device.
3.5.4 Shares (Samba)
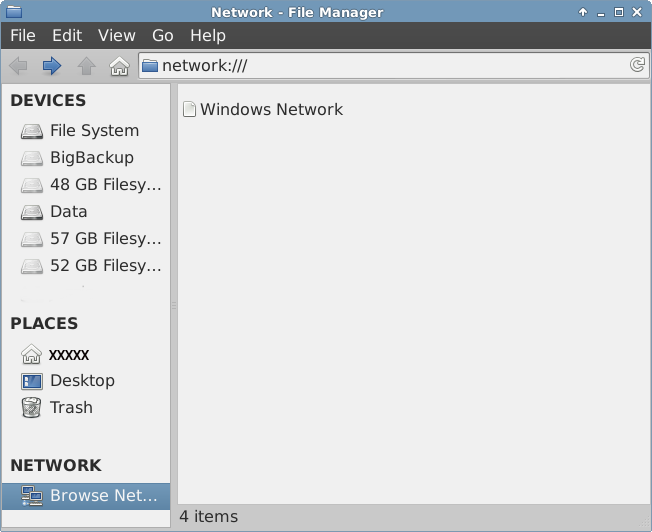
Figure 3-23: Using Thunar to browse network shares
Thunar can connect to shared folders (AKA Samba Shares) on Windows, Mac, Linux computers and NAS (Network Attached Storage) devices. For printing with Samba, see Section 3.1.2.
- Select Browse Network in the left pane to show various networks, including Windows Network
- Click the Network you want to see available Workgroups (often called WORKGROUP by default). Now drill down to find what you are looking for.
- Select a Workgroup for available Samba Servers
- Select a Server for available Samba Shares
- Select a Samba Share to see all the available folders
- A shortcut for the selected Share will be created in the Network sidebar section
3.5.5 Creating shares
On MX, Samba can also be used to create Shares for other computers (Windows, Mac, Linux) to access. Creating Public Shares is fairly straightforward, but keep in mind that creating Samba Shares is a complex area from a configuration perspective. For example, the task creating Shares that are specific to individual users and are authenticated properly is beyond the scope of this help. Comprehensive reference guides can be found at Using Samba and Samba.org.
Click Start menu > System > Samba to bring up the Samba Server Configuration tool. Click on the plus sign icon to add a share; details available by clicking on the Help icon. NOTE: users often find that the configuration tool must be augmented with the manual method, below.
If for some reason you need or want to create shares manually, follow these steps.
- Use an existing /home/foldername or create a folder and make it Read & Write for Owner, Group: users, and Others. In other words, make it open to the world. Starting with a simple Public Share is a good place to learn. NOTE: If you are concerned about network security do not use this approach. Instead, study the references above to learn how to create secure shares.
- To establish the Samba Share, you must edit the configuration file as root. It can be found at: /etc/samba/smb.conf Edit the line: workgroup = xxxxx to match whatever Windows Workgroup name you are using (default is WORKGROUP)
-
At the very end of the file add the following lines to establish your Share [SHARENAME]path = /home/username/foldernameguest ok = yesread only = nobrowseable = yesforce create mode = 777force directory mode = 777
- Save the file. When adding a share, the Samba daemon should read it and implement the changes immediately. If you make changes to an existing share, you will need to restart Samba to make sure your changes take effect by going to the terminal and becoming root and entering: service samba restart
- You can also check for mistakes in smb.conf by running testparm from the terminal
- Go to another computer and test your ability to see your Samba Share by browsing the network and testing read & write to the Share
MORE: Xfce Docs: Thunar
3.6 Sound
MX Linux sound depends by default on Advanced Linux Sound Architecture (ALSA), which forms part of the kernel. In most cases sound will work out of the box, though it may need some minor adjustment. Click on the speaker icon to mute all audio, then again to restore. Place cursor over speaker icon in the Notification Area and use scroll wheel to adjust volume.
3.6.1 Sound Card Set-up
The sound card is configured and volume of selected tracks adjusted by right-clicking the speaker icon in the Notification Area > Open Mixer. If you have more than one sound card, be sure to select the one you want to adjust using the pull-down menu at the top of the Mixer. If that does not seem to work after logging out and back in, see Troubleshooting, below.
Note that by default Left and Right outputs are linked to keep them balanced, but you can unlink them by clicking on the chain icon below any pair of channel sliders; click again to relink. Below each slider pair, click on the small speaker icon will mute that channel. The center button of a three-button mouse can be configured for direct access to the Audio Mixer by right-clicking the speaker icon > Preferences.
- System volume. A default volume is set during boot of the LiveMedium or installation, but it may not be optimal for a given system. To change it, click and hold the sliders in the channel Master and move them to the level you wish. Then do the same for the channel PCM; if you do not see this channel, click on the Select Controls button in the lower left corner and add it. To see the Master Volume without opening the Mixer, place the cursor over the Speaker icon.
- System beep when logging out or booting. Adjust as desired. To turn off completely, it may help to move the sliders all the way up, then all the way down. Change takes effect after logging out/in. Note that the BIOS may have a beep switch as well, note also that not all mixers have the Beep Control.
- Other. Follow the same procedure using the channel (e.g., Headphone) you want to adjust. If your sound setup requires channels that are not visible, use the Select Controls button to add them.
3.6.2 Simultaneous card use
There may be times when you would like to use more than one card simultaneously; for instance, you may want to hear music both through headphones and through speakers in another location. This is not easy to do in Linux, but the solutions on this MX/antiX Wiki page may work, if you are careful to adjust the card references to your own situation. See also this page.
3.6.3 Troubleshooting
-
No sound, though speaker icon is in the Notification Area.
- Try raising all controls to a higher level.
- Click on the Select Controls button to add other channels that you might need, then raise the volume on those.
- If you have recently installed PulseAudio (see below), open the ALSA mixer (Audio Mixer) and make sure the speakers are not muted.
- Edit the configuration file directly: see Section 7.4.
-
No sound, no speaker icon is in the Notification Area. It could be that the sound card is missing or unrecognized, but the most common problem is that of multiple soundcards, which we address here.
- Solution 1: click Start menu > Settings > MX Sound Card, and follow the screen to select and test the card you want to use.
- Solution 2: install PulseAudio and use its volume control (pavucontrol) to select the correct sound card
- Solution 3: enter the BIOS and turn off HDMI
-
Particular applications. Some applications have sound setups that require special steps.
- Skype. From version 4.3x onward, Skype only supports PulseAudio (see below). This results in no sound card being chosen on a system that uses ALSA alone, so that the only item in the Skype > Options > Sound Devices pull-down menus is Default, which does not work. The only solution is to install PulseAudio (below), which is designed to work with ALSA; see below.
3.6.4 Sound servers
Whereas the Sound Card is a hardware item accessible to the user, the Sound Server is software that works largely in the background. It permits general management of sound cards, and provides the ability carry out advanced operations on the sound. The most common is described here.
-
PulseAudio. PulseAudio is an advanced open-source sound server that can work with several operating systems. It has its own mixer, called pavucontrol, that is installed along with it in MX Linux if using the MX Package Installer. It allows the user to control the volume and destination of the sound signal.
- Because PulseAudio closely integrates with other parts of the software, it is best installed through MX Package Installer.
- According to the Debian Wiki, it is possible to switch PulseAudio on/off as needed.
- After PulseAudio has been installed, you can use the volume icon in the Notification Area by right-clicking the speaker icon > Open mixer, and selecting to link to the PulseAudio Mixer. An alternative is to add the Pulse Audio Volume Control to the Panel by right-clicking the panel > Panel > Add New Items and selecting the Launcher; then click the plus sign to select the Control you want.

Figure 3-24: Selecting the PulseAudio Mixer in the Alsa Mixer
3.6.5 Links
- MX/antiX Wiki: Sound not working
- ALSA: SoundCard Matrix
- ArchLinux Wiki: ALSA Information
- PulseAudio Documentation: Free desktop
3.7 Localization
MX-14 is maintained by an international Dev Team that constantly works to improve and expand the options for localization. There are many languages into which our documents have not yet been translated, and if you can help with this effort please post on the Translation Forum.
3.7.1 Installation
The primary act of localization occurs during the use of the LiveMedium.
-
When the bootloader screen first comes up, make sure to use the function keys to set your preferences.
- F2. Select the language
- F3. Select the timezone you wish to use.
- If you have a complicated or alternative setup, you can use boot cheat codes. Here is an example to set a Tartar keyboard for Russian: lang=ru kbvar=tt . A full list of the boot parameters (=cheat codes) can be found in the MX/antiX Wiki.
- If you set the locale values at the boot screen, then Screen 7 should show them during installation. If not, or if you want to change them, select the language and timezone you want.
3.7.2 Post-installation

Figure 3-25: Adding another keyboard layout in Settings Manager
Here are the configuration steps you can take to localize your MX Linux after installation.
-
Change the keyboard:
- Click Start Menu > Settings > Settings Manager > Keyboard, Layout tab.
- Uncheck Use system defaults, then click on the +Add button at the bottom and select the keyboard(s) you want available.
- Exit, then click Keyboard Switcher (flag) in the Notification Area to select active keyboard.
- Get language packs for major applications: click Start menu > System > MX Package Installer, provide the root password, then click Language to find and install language packs for the applications you use.
- Change time settings: click Start Menu > System > TimeSet and select your preferences. If you are using the digital clock DateTime, right-click > Properties to choose 12h/24h and other local settings.
- Get spellchecker to use your language: install the aspell or myspell package for your language (e.g., myspell-es).
- Get local weather info: right-click the Panel > Panel > Add New Items > Weather Update. Right-click > Properties, and set the locale you want to see (it will guess by your IP address).
- For Iceweasel localization, install the appropriate iceweasel-l10n- package for your language of interest; e.g., for Spanish (Spain), install iceweasel-l10n-es.
3.7.3 Further notes
- It may happen that an individual application may not have a translation in your language; unless it is an MX application, we can do nothing about that, so you should send a message to the developer.
- Some desktop files that are used to create the Start menu may be missing a comment in your language, even though the application itself does have a translation in that language; please let us know with a post in the Translation Forum.
3.8 Customization
Xfce4 makes it very easy to change basic function and look of a user’s configuration, and the integration of Xfce 4.12 has now provided additional features.
- Most importantly, remember: Right-click is your friend!
- Great control is available through the Settings Manager (Panel icon)
- User changes are stored in Xfce4 config files in the directory: /.config/
- Most system-wide Xfce4 config files are in /etc/skel/ or /etc/xdg/
MORE: Xfce Tips and tricks
3.8.1 General look
The overall appearance can be customized in Start menu > Settings > Settings Manager.
- Click on Appearance to change style, icons, fonts and some settings.
- Click on Window Manager to select the window treatment.
- Click on Desktop (also by right-clicking desktop) to change background, menus, and some icon settings.
- Manage default desktop icons such as Removable Devices by right-clicking desktop > Desktop Settings ... > Icons tab.
MORE: Xfce4 docs: Appearance.
3.8.2 Panel

Figure 3-26: Preferences screen for customization of panels
- To move the panel, unlock it by right-clicking a panel > Panel > Panel Preferences.
- To change display mode, select from the pull down menu: Horizontal, Vertical, or Deskbar.
- To automatically hide the panel, choose from pull down menu: Never, Always, or Intelligently (hides the panel when a window overlaps with it).
-
Install new panel items by right-clicking an empty space > Panel > Add New Items.You then have 3 choices:
- Select one of the items on the main list that pops up
- If what you want is not there, select Launcher. Once it is in place, right-click > Properties, click the plus sign and select an item off the list that pops up.
- If you want to add an item not on either list, then select the empty item icon below the plus sign and fill in the dialog box that pops up.
- New icons show up at the bottom of the Panel; to move them, right-click > Move
- Change the look, orientation, etc. by right-clicking the panel > Panel > Panel Preferences.
- To use a horizontal instead of a vertical panel, right-click the panel > Panel > Panel Preferences, and unlock the panel. Then grab one of the hashed ends, and swing it around, relocating the icons as you wish.
- Add or delete a panel in Panel Preferences by clicking on the plus or minus button to the right of the top panel pull-down menu.
MORE: Xfce4 docs: Panel.
3.8.3 Desktop
The default desktop (AKA wallpaper, background) can be changed in various ways.
- Right-click any image > Set as wallpaper
- If you want the wallpapers available to all users, become root and put them in the /usr/share/xfce4/backdrops folder; you will probably have to create this folder, either in a root Thunar or in a root terminal using the command mkdir.
- If you need to restore the default wallpaper, it is in /usr/local/share/backgrounds/.
Many other customizations are available in Settings Manager.
- Add standard icons such as Trash or Home to the desktop in Desktop, icons tab.
-
Window behavior such as switching, tiling, and zooming can be customized in Window Manager Tweaks.
- Window switching via Alt+Tab can be customized to use a compact list instead of traditional icons
- Window switching via Alt+Tab can also be set to show thumbnails instead of icons or a list, but it requires turning on compositing which some older computers may have difficulty supporting. To enable, first deselect Cycle on a list list on the “Cycling” tab, then click on the “Compositor” tab and check ’Show windows preview in place of icons’ when cycling.
- Window tiling can be accomplished by dragging a window to a corner and releasing it there..
- Window zooming is available by using the Alt + Mouse Wheel combination.
- To select a different wallpaper for each Workspace, got to Background and uncheck the option ’Apply to all workspaces.’ Then select a wallpaper and repeat the process for each workspace by dragging the dialog box to the next workspace and selecting another wallpaper.
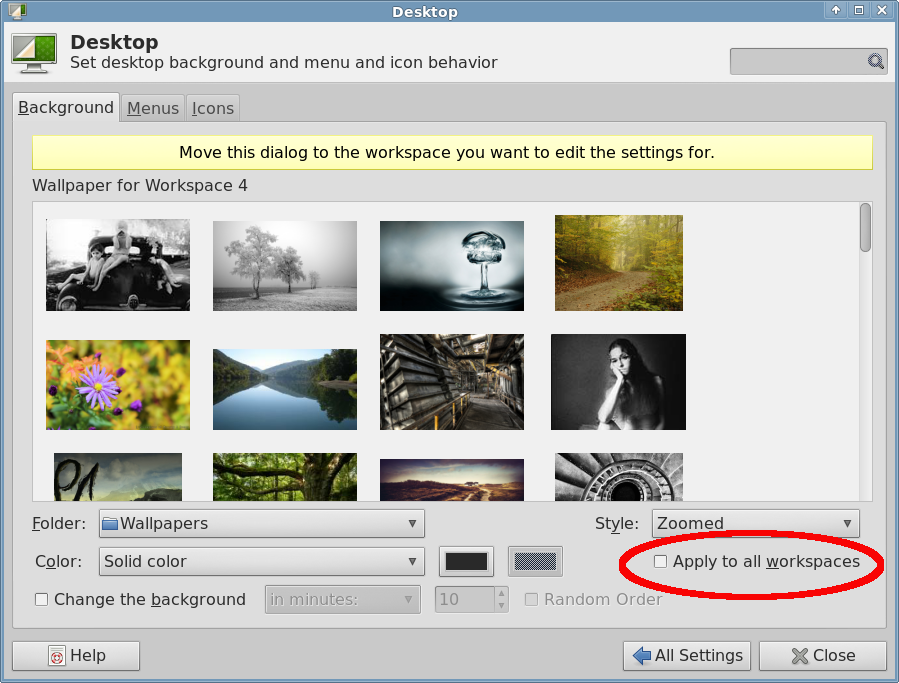
Figure 3-27: Setting different backgrounds for each workspace
You can display almost any kind of information on the desktop by using Conky
- Install conky-manager2 from the repos.
- Click Start menu > Accessories to find Conky Manager.
- In Conky Manager, you can highlight each conky and hit Preview to see what it looks like. Be sure to close each preview before going to another.
- If it seems that Conky Manager has frozen, check for a window with the preview hiding behind it.
- Check the box to select any conky you want to use. It will be auto-installed.
- The configuration files are stored in the folder /conky-manager
MORE: Conky home page

Figure 3-28: Many conky configurations are available in Conky Manager 2
3.8.4 Keyboard
By default, MX-14 uses the keyboard layout that matches the user’s language choice. To make another layout available, see Section 3.7.2.
3.8.5 Menu (“Whisker”)
MX Linux comes by default with the Whisker Menu, though a classic menu can be easily installed by right-clicking a panel > Panel > Add New Items > Applications Menu. Whisker Menu is highly customizable.
- Right-click the menu icon > Properties to set preferences.
- Favorites are easy to add: right-click any menu item > Add to Favorites.
- Simply drag and drop Favorites to arrange them as wished. Right-click any entry to sort or remove.
Menu entries can be edited with two applications (the menu entry “desktop” files are located in /usr/share/applications/ and can also be edited as root directly).
- MX Menu Editor (Section 3.2.7).
-
A native Xfce application
- Click Start menu > Accessories > Application Finder (or Alt-F3), and right-click any entry.
- Context menu contains Edit and Hide (the latter can be very useful).
- Selecting Edit brings up a screen where you can change name, comment, command and icon.

Figure 3-29: Menu entry edit screen
3.8.6 Login greeter
For common modifications of the login greeter, see the MX/antiX Wiki.
3.8.7 Bootloader
The bootloader (GRUB) menu of an installed MX-14 can be modified by clicking Start menu > System > Grub customizer. This tool allows users to configure some important Grub settings such as the boot entry list configuration, names of partitions, etc.
3.8.8 Default applications
The default applications to be used for general operations are set by clicking Start menu > Settings > Settings manager > Preferred Applications, where you can set four preferences.
- Web browser
- Mail reader
- File manager
- Terminal emulator
Many defaults for specific file types are set during an application’s installation. For instance, *.docx and *.xlsx files are associated with LibreOffice when it is installed. But often multiple options exist for a given file type, and a user would like to determine which application would launch the file. A common example is when a user wants to open an *.mp3 file with a different music player than Clementine (default). A simple method exists to make that change.
- Right-click any example of the file type you are interested in
-
Make one of the following selections
- Open with <listed application>. This will open the file with the selected application for this particular instance, but will not affect the default application.
- Open with Other Application. Scroll down the list to highlight the one you want (including “Use a custom command”), then check Open. The box at the bottom “Use as default for this kind of file” is checked by default, so your selection will now become the new default application that is launched when you click on any file of that particular type. Uncheck the box for one-time usage.
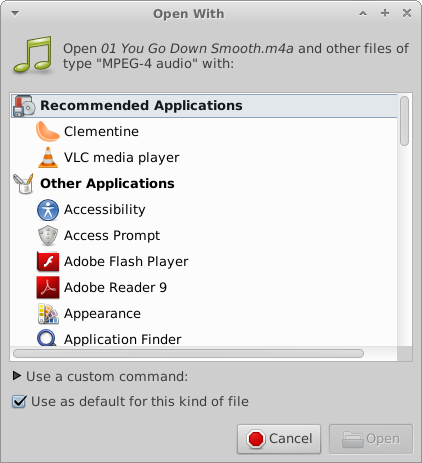
Figure 3-30: Changing default application
4 Basic use
4.1 Internet
4.1.1 Web browser
- MX Linux comes with Iceweasel installed, which is a fork of Mozilla’s Firefox that adds backported security fixes to the declared Debian stable version and omits trademarked artwork. Beyond these two changes, it is identical to Firefox, and supports all the same add-ons.
- Earlier versions of MX Linux used the lightweight browser QupZilla as default, which is also based on Firefox. Its most recent releases are worthy of consideration by anyone interested in limited space and simpler design. Supports a number of the most popular Firefox add-ons.
- Other browsers — including Firefox — are available for easy download and installation via the MX Package Installer.
4.1.2 Email
-
Claws-Mail. Based on GTK+, this lightweight and fast email client is installed with MX Linux and available by clicking Start Menu > Internet. A large number of useful plugins (RSS aggregator, calendar, laptop LED handling, etc.) are available from the repos. Since setting up a Gmail account is not intuitive with Claws-Mail, here are the values you will need:Server: imap.googlemail.comSend: Use STARTTLS command to start SSL sessionIMAP4: Use SSL for IMAP4 connectionIMAP4 Port: 993
- Thunderbird is another popular choice. It integrates well with Google Calendar and Google Contacts, see Section 4.10. MX Package Installer.
4.1.3 Chat
- XChat IRC. This IRC chat program is installed by default in MX Linux, and makes the exchange of text messages easier for the user.
- Pidgin. This graphical, modular instant messaging client is capable of using multiple networks at once. MX Package Installer.
- Skype. A popular proprietary program for instant messaging as well as voice and video chat. It is cross-platform and can be installed on MX Linux without problem using the MX Package Installer > Network (this link will also install PulseAudio for sound, see Section 3.6.3). MX Package Installer.
-
Troubleshooting: occasionally Skype does not pick up a particular webcam. That can often be solved by opening a terminal, becoming root, and issuing two commands one at a time that will first unload, then reload the driver. (If that works, then a script can be written to execute those commands automatically.)modprobe -r uvcvideomodprobe uvcvideo
See also Section 4.11.7 Google Talk.
4.2 Multimedia
Listed here are some of the many multimedia applications available in MX Linux. Advanced professional applications also exist, and can be found through targeted searches in Synaptic.
4.2.1 Music

Figure 4-1: Playing a song file with Clementine
-
Players
- Clementine. A modern music player and library organizer that can play every source from a CD to a Cloud Service. Installed by default.
- Audacious. A full-featured music player and manager. MX Package Installer.
- DeaDBeeF. A lightweight player with a small memory footprint, robust set of basic features, and focus on music playback. MX Package Installer.
-
Rippers and editors
- Asunder. A graphical Audio CD ripper and encoder that can be used to save tracks from Audio CDs.
- EasyTAG. A simple application for viewing and editing tags in audio files.
4.2.2 Video
-
Players
- VLC. Plays a large range of video and audio formats, DVDs, VCDs, podcasts, and multimedia streams from various network sources. Installed by default.
- SMplayer. A mediaplayer that can play virtually all video and audio formats. MX Package Installer.
- Minitube. Standalone player of YouTube videos provides endless stream for any search term. Installed by default.
- Netflix. Desktop capability of streaming Netflix movies is installed by this package. MX Package Installer.
- Pipelight. Allows you to run your favorite Silverlight application directly inside your Linux browser. MX Package Installer.
 Figure 4-2: Running desktop Netflix on MX Linux
 -
Rippers and editors
- HandBrake. A video ripper that is easy to use, fast and simple.
- DeVeDe. This utility automatically converts material to formats compatible with audio CD and video DVD standards.
- DVDStyler. Another good authoring utility. MX Package Installer.
- OpenShot. A simple-to-use and feature-rich video editor. MX Package Installer.
4.2.3 Photos
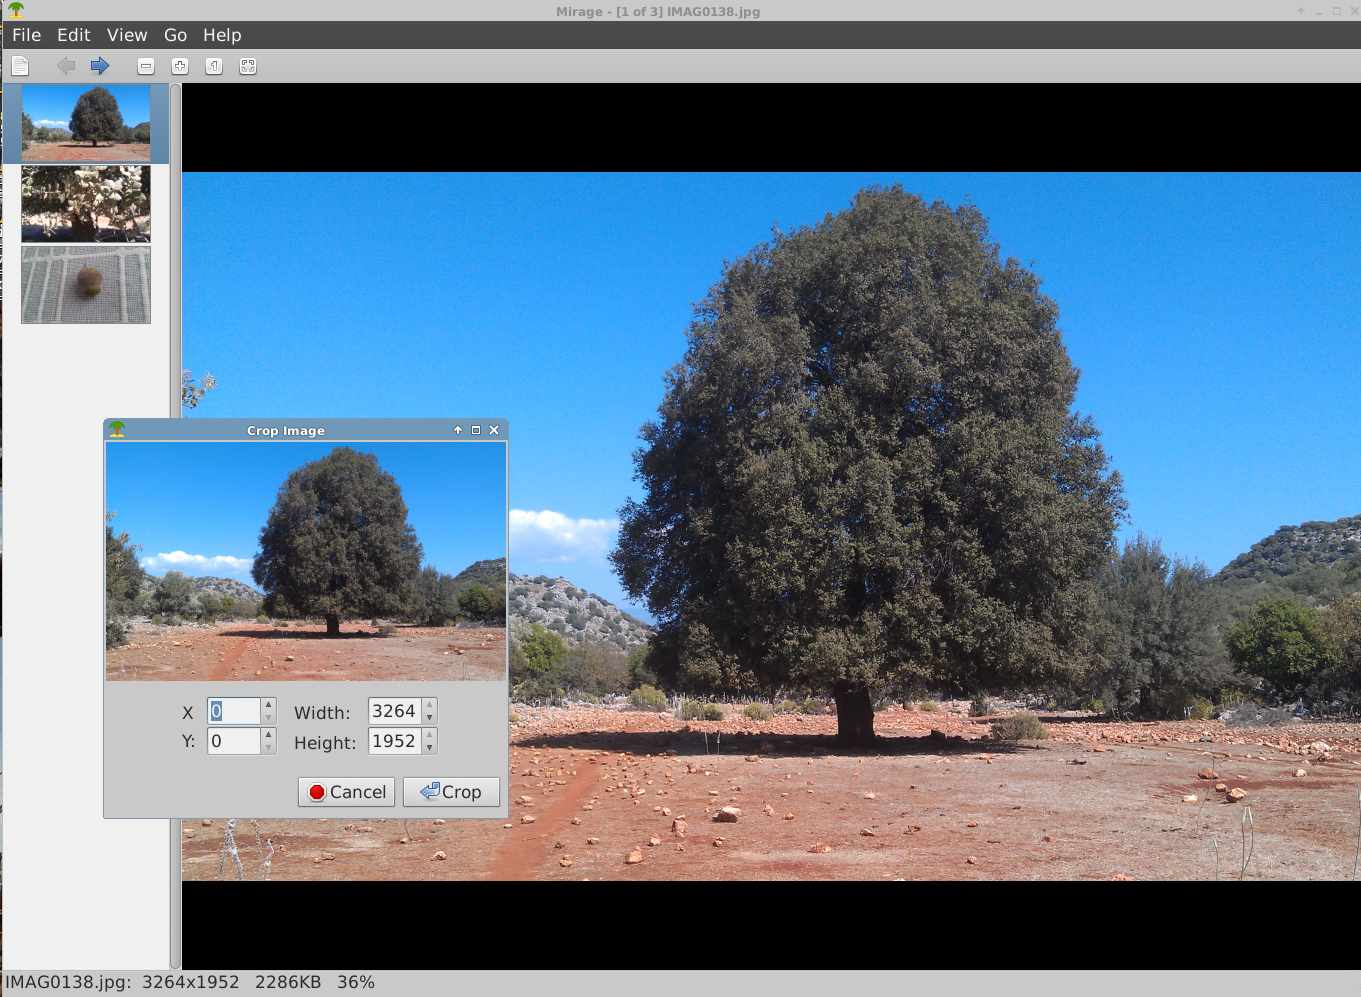
Figure 4-3: Using the crop tool in Mirage
- Mirage. Installed by default in MX LInux, this speedy application is easy to use and allows you to view and edit digital photos.
- Fotoxx. This fast application allows easy photo editing and collection management.
- GIMP. The Help package (gimp-help) must be installed separately, and is available in many languages. MX Package Installer.
4.2.4 Screencasting
100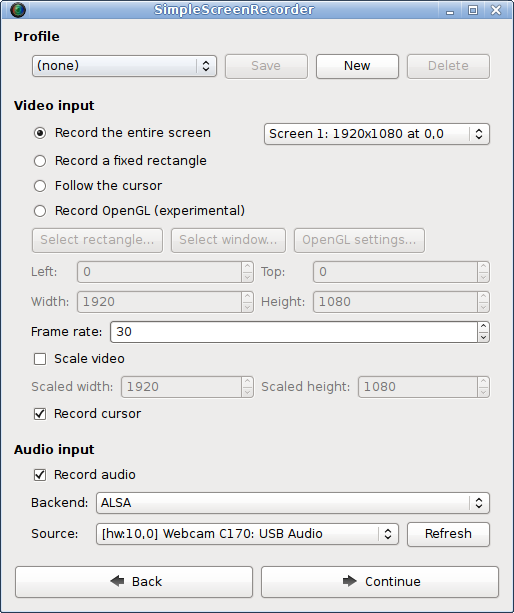

Figure 4-4: Main screen of SimpleScreenRecorder
- SimpleScreenRecorder. A simple but powerful program to record programs and games. MX Package Installer.
- RecordMyDesktop. Captures audio-video data of a linux desktop session. MX Package Installer.
4.2.5 Illustrations
- Pinta. This easy to use drawing/editing program provides a simplified method to create and manipulate images.
- LibreOffice Draw. Diagrams, drawings and pictures can be created and modified with this application.
- Inkscape. This illustration editor has everything needed to create professional-quality computer art. MX Package Installer.
4.3 Office
4.3.1 Office suite
MX Linux comes with a great free office suite called LibreOffice, which is the Linux equivalent and near drop-in replacement for Microsoft Office®. The suite is available under Start Menu > Office > LibreOffice. LibreOffice supports the .docx, .xlsx and .pptx file formats of Microsoft Office 2007 and above.
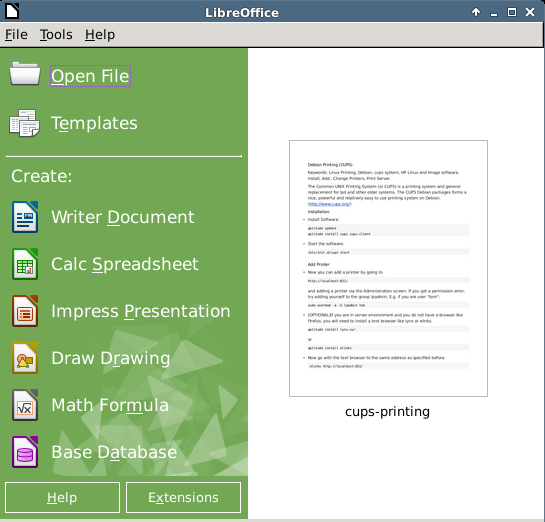
Figure 4-5: Main dashboard in LibreOffice
-
Installed by default.
- Word Processor: LibreOffice Writer. An advanced word processor compatible with .doc and .docx files.
- Spreadsheet: LibreOffice Calc. An advanced spreadsheet compatible with .xls and .xlsx files.
- Presentation: LibreOffice Impress. Used for presentations, etc., compatible with .ppt and .pptx files.
- Draw: LibreOffice Draw. Used to create graphics and diagrams.
- Math: LibreOffice Math. Used for for mathematical equations.
-
Available from the repos.
- Base: LibreOffice Base. Used to create and manipulate databases. If using this application to create or use databases in the native LibreOffice format, you must also install libreoffice-base-drivers and libreoffice-sdbc-hsqldb
4.3.2 Office finances
- GnuCash. Financial software for office use. It is easy to learn, and allows you to track bank accounts, stocks, income and expenses. Can import data in QIF, QFX and other formats, and supports double entry accounting. MX Package Installer. The Help package (gnucash-docs) needs to be installed separately.

Figure 4-6: New account in GnuCash
4.3.3 PDF
- QPDFview. A fast and lightweight viewer that includes a number of basic tools. Installed by default.
- Adobe Reader for Linux offers greater functionality (such as commenting or form filling). MX Package Installer (under Office).
- PDFShuffler makes simple the reordering, deleting and adding of PDF pages.
- gscan2pdf is a handy method of scanning documents to PDF. MX Package Installer (under Graphics).
- For other functions (e.g., creating a PDF form using LibreOffice), see MX/antiX Wiki: PDF.
4.3.4 Desktop publication
- Scribus. Professional page layout that produces press-ready output. Available via MX Package Installer.
4.3.5 Video conferencing
- TeamViewer. Cross-platform application for Remote Support and Online Meetings. Free for private use.
4.4 Home
4.4.1 Finances
- Grisbi is very useful for the home. It can import QIF/QFX files, and has an intuitive interface.
4.4.2 Media Center
- Kodi Entertainment Center (formerly XBMC) allows users to play and view most videos, music, podcasts, and all common digital media files from local and network storage media.
4.4.3 Organization
- Notes. This handy Xfce plugin (xfce4-notes-plugin) allows you to create and organize sticky notes for your desktop.
- Osmo. Nice compact application that includes calendar, tasks, contacts and notes,
- Lightning calendar.

Figure 4-7: The personal information manager Osmo
4.5 Security
4.5.1 Firewall
- Gufw. A personal firewall configuration utility that makes it easier for the user to configure the firewall.
4.5.2 Antivirus
- KlamAV. Useful to stop Linux users from unknowingly passing virus-infected emails and other documents to susceptible users.
4.5.3 AntiRootkit
- chkrootkit. This application scans systems for known and unknown rootkits, backdoors, sniffers and exploits.
4.5.4 Password protection
- KeePassX. A password manager or safe that helps you to manage your passwords in a secure way.
4.5.5 Web access
- Dansguardian. Provides a flexible method of filtering web access for kids according to your needs.

Figure 4-8: Web filter in action on Dansguardian
4.6 Accessibility
Various open-source utilities exist for MX Linux users with disabilities by virtue of Xfce4 tools.
- Install at-spi from the repos and reboot.
- Click Start menu > Settings > Accessibility, and tick Enable Assistive Technologies.
- Change the available options to suit your liking.
MORE: Xfce4 documentation
4.7 System
4.7.1 Get root privileges
There are two ways to obtain root (adminstrative, superuser) privileges that you need to make system changes (e.g., installing software) using a terminal.
- su: requires root’s password and grants privileges for entire terminal session
- sudo: requires your own password and grants privileges for a single command
In other words, su lets you switch user so that you’re actually logged in as root, while sudo lets you run commands in your own user account with root privileges. Also, su uses the environment (user-specific configuration) of the user root, while sudo allows root-level changes but keeps the environment of the user issuing the command.
In general, MX Linux uses a “true root,” meaning that this Manual and the Forum will generally instruct the use of su.
For details, consult the man pages.
4.7.2 Get hardware specs
- Click Start menu > System > System Profiler and Benchmark for a nice graphic display that includes the results of various tests.
-
Open a terminal and enter this command:inxi -FSee Section 6.5 for the many other features of inxi.
4.7.3 Create symbolic links
A symbolic link (also soft link or symlink) is a special kind of file that points to another file or folder, much like a shortcut in Windows or an alias in Macintosh. A symbolic link does not contain any actual data (as a hard link does), it just points to another location somewhere in the system.
There are two ways to create a symlink: Thunar or the command line.
-
Thunar
- Navigate to the file or folder (target of the link) that you want to point to from another location or under another name
- Right-click what you want to link > Create Symlink, and a symlink is created where you currently are
- Right-click the new symlink > Cut
- Navigate to where you want the link to be, right-click an open area> Paste. Change if desired the link name.
-
Command line: Open a terminal and type: ln -s TargetFileOrFolder LinkName
- Be sure to include full path as well as file/folder names.
- The -s switch indicates that a symbolic link and not a hard link (that points directly to data) is being created.
-
For example, to symlink a file named “foo” in your Downloads folder to your Documents folder, enter this:ln -s ~/Downloads/foo ~/Documents/foo
4.7.4 Find files and folders
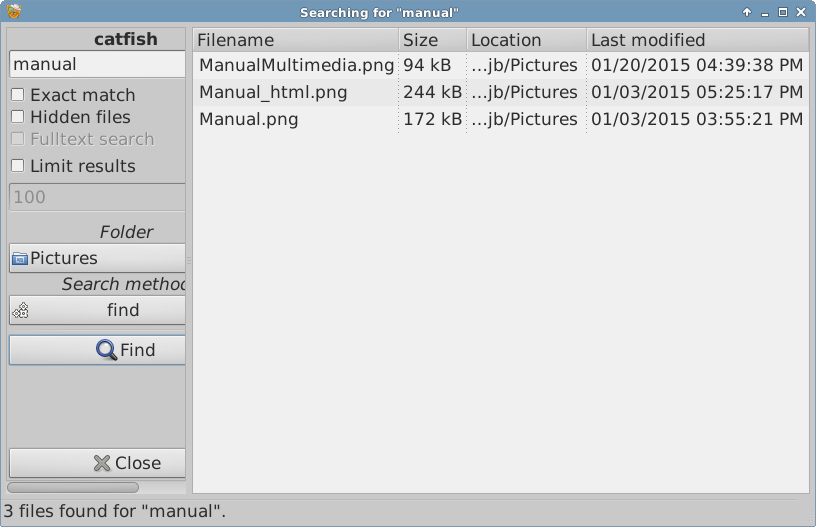
Figure 4-9: Search screen of Catfish
Catfish is installed by default in MX Linux, and can be launched from the Start menu > Accessories. It is also integrated into Thunar so that the user can right-click a folder > Find files here.
There are some very handy commands for use in a terminal.
-
locate. For each given pattern, locate searches one or more databases of file names and displays the ones that contain the pattern. For example, typing: locate iceweaselwill return an extremely long list with every single file that has the word “iceweasel” in its name or in its path. This command is similar to find and is best used when the exact file name is known.
-
whereis. Another command-line tool, installed by default. For each given pattern, whereis searches one or more databases of file names and displays the file names that contain the pattern, but it ignores paths so the return list is much shorter. For example, typing: whereis iceweaselwill return a much shorter list something like this:iceweasel: /usr/bin/iceweasel /etc/iceweasel /usr/lib/iceweasel/usr/bin/X11/iceweasel /usr/share/iceweasel /usr/share/man/man1/iceweasel.1.gz
-
which: Arguably the most convenient tool of all, for a given pattern, which attempts to identify the executable. For example, typing: which iceweaselreturns a single item:/usr/bin/iceweasel
4.7.5 Kill runaway programs
-
Desktop
- Press Ctrl-Alt-Esc to change the cursor into a skull and crossbones. Click on any open screen to kill it, right-click to cancel. Be careful not to click on the desktop or your session will end abruptly.
- Task Manager: click Start menu > System > Task Manager, select process and right-click to stop, terminate or kill.
- A traditional tool is also available: click Start menu > System > Htop, which brings up a terminal showing all running processes. Locate the program you want to stop, highlight it, press F9, then Return.
- Terminal: Press Ctrl-C, which will usually stop a program/command you started in a terminal session.
-
If the above solutions don’t work, try these more extreme methods (listed in increasing severity).
- Restart X. Press Ctrl-Bksp to kill all session processes, leaving you back at the login screen. Any unsaved work will be lost.
- Use magic SysRq key (REISUB). Hold down the Alt-SysRq or Alt-PrtScrn key (sometimes only the left Alt key will work), and slowly press the keys R-E-I-S-U-B; your system should shut down correctly and reboot. The purpose of this magic key is to go through several stages that nurse your system safely out of a failure of some sort, and often only the first 2 letters are sufficient. Example, Alt-SysRq + R, then E, then try what you were attempting to do before the failure, if the system is still unresponsive, continue with the I, try again and if you still have no joy, you may as well finish the sequence.
- If nothing else works, hold down the power button of your computer for 10 seconds or so until it shuts down.
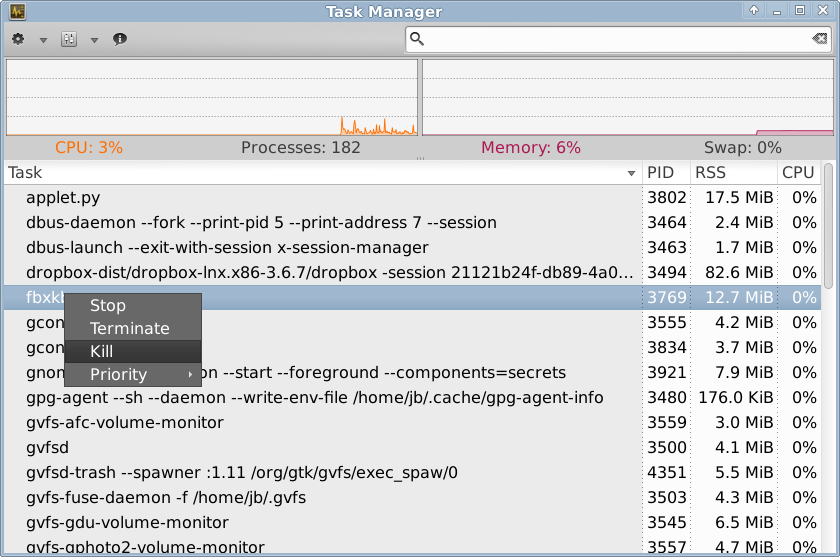
Figure 4-10: Task Manager main screen, ready to kill a process.
4.7.6 Track performance
-
GUI
- Xfce plugins. Xfce 4.12 brings a number of plugins for monitoring the system that can be placed in the Panel, including Battery Monitor, CPU Frequency Monitor, CPU Graph, Disk Performance Monitor, Free Space Checker, Network Monitor, Sensor plugin, System Load Monitor, and Wavelan. They can all be installed with the metapackage xfce4-goodies.
- Conky. See Section 3.8.3.
-
CLI
-
lm-sensors. This hardware health monitoring package is installed by default in MX Linux. Open a terminal, become root, and enter:sensors-detectClick Return to answer yes to all questions. When it has finished, you will be able to get detailed information about the readings of the sensors that are available on your system by opening a terminal and entering: sensors.
-
lm-sensors. This hardware health monitoring package is installed by default in MX Linux. Open a terminal, become root, and enter:
Battery level is monitored by the Power Manager plugin on the Panel, and a dedicated Panel plugin is also available.
4.7.7 Schedule tasks
-
GUI
- Scheduled tasks (gnome-schedule). A very handy way to schedule system tasks without having to directly edit system files.
-
CLI
- You can manually edit crontab, a simple text file that holds a list of commands that are to be run at specified times.
4.7.8 Correct time
If your clock time is always wrong, there are 4 possible issues:
- wrong timezone
- wrong selection of UTC versus local time
- BIOS clock set wrong
- time drift
These issues are usually addressed by using TimeSet (Start menu > System); for command line techniques, see the MX/antiX Wiki.

Figure 4-11: Screen of TimeSet, showing various options.
4.7.9 Show Key Lock
On many laptops there is no indicator light for the activation of the CapsLock or NumLock keys, which can be very annoying. To solve this with an onscreen notifier, install indicator-keylock from the repos.
4.8 Backup
The most important practice is to back up your data and configuration files regularly, a process that is easy in MX Linux. It is highly recommended that you back up to a different drive than the one your data is on! The average user will find one of the following graphical tools convenient, though CLI methods will also work.
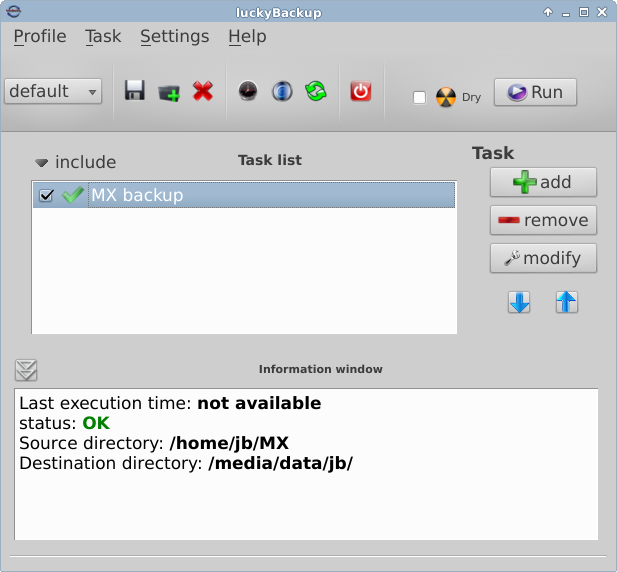
Figure 4-12: Main screen of Lucky Backup
- LuckyBackup. An easy program to back up and sync your files. Installed by default.
- SystemBack. Makes it easy to create backups of system and users configuration files.
- Cloud service. There are many cloud services that can be used for backing up or synching your data. DropBox and Google Drive are probably the best known, but many others exist.
-
Cloning. Create a complete image of the harddrive.
- Clonezilla. Download Clonezilla Live from the Clonezilla home page, and then reboot into it.
- CLI tools. See the discussion in the Arch Wiki: Cloning
- CLI commands for doing backups (rsync, rdiff, cp, dd, tar, etc.).
See also Section 6.6.2 Save system to live ISO.
4.8.1 Data
Make sure you back up your data, including documents, graphics, music, and mail. By default, most of this is stored in your /home directory unless you have a separate data partition or external data location.
4.8.2 Configuration files
Here is a list of items to consider for backup.
- /home. Holds most of the personal configuration files.
- /root. Holds the changes you have made as root.
- /etc/X11/xorg.conf. X configuration file, if there is one.
- The GRUB2 files /etc/grub.d/ and /etc/default/grub.
4.8.3 List of installed program packages:
It’s also a good idea to save in your /home directory a file that contains the list of programs that you have installed with Synaptic, apt-get or Gdebi. If in the future you need to reinstall, you’ll just have to paste the names of the files into an apt-get install command. You can create an inventory of all packages on your system installed since installation by copying this long command and pasting it in a terminal.
To reinstall ALL those packages at once: make sure that all needed repositories are enabled, then issue these commands one at a time:
dpkg --set-selections < apps_installed.txt
su
apt-get update
apt-get dselect-upgrade
4.9 Games
MX Linux comes with only a few simple games, but many more are available. Browsing the extensive list of games available through Synaptic (click Sections >Games at the bottom of the left panel) or following the links below will bring up many other titles for your enjoyment.
The following list contains some examples to whet your appetite.
4.9.1 Adventure and Shooter Games
- Chromium B.S.U.: A fast paced, arcade-style, top-scrolling space shooter. Installed by default.
- Beneath A Steel Sky: A science-fiction thriller set in a bleak post-apocalyptic vision of the future.
- Kq: A console-style role playing game, similar to Final Fantasy.
- Mars. “A ridiculous shooter.” Protect your planet from the oncoming doom of your jealous neighbours!

Figure 4-13: Enemy warships on the attack in Chromium B.S.U
4.9.2 Arcade Games
- Defendguin: A clone of Defender, where your mission is to defend little penguins.
- Frozen Bubble: Colored bubbles are frozen at the top of the playing screen. As the Ice Press descends, you must pop out groups of frozen bubbles before the Press reaches your shooter.
- Planet Penguin Racer: a fun racing game with your favorite penguin. page:
- Tuxracer home page
- Ri-li: A toy train game.
- Supertux: A classic 2D jump’n’run side-scrolling game in a style similar to the original SuperMario games.
- Supertuxkart: A much improved version of tuxkart.
Figure 4-14: Ri-li train needs a turn choice soon
4.9.3 Board Games
- Gottcode games: Gottet (Tetris clone), Peg-E (Peg solitaire game) and Simsu (Basic Sudoku game). Installed by default.
- Mines (gnomines): A minesweeper game for 1 player.
- Do’SSi Zo’la: The goal of the basic Isola game is to block the opponent by destroying the squares which surround him.
- Gnuchess: A chess game.
Figure 4-15: High-tension moment in Mines.
4.9.4 Card Games
Here are some fun card games available from the repos.
- Hearts (gnome-hearts):The classic hearts game.
- Pysolfc: Over 1,000 so games from a single application.
4.9.5 Desktop Fun
- Xpenguins. Penguins walk around your screen. Can be customized with other characters like Lemmings and Pooh Bear (need to allow programs to run in root window).
- Oneko. A cat (neko) follows your cursor (the mouse) around the screen. Can be customized with a dog or other animal.
- PhunLand. Phun is a free game like 2D physics sandbox where you can play with physics like never before. The playful synergy of science and art is novel, and makes Phun as educational as it is entertaining.
- Xteddy. Puts a cute teddy on your desktop. Alternatively you can add your own image.
- Tuxpaint. A drawing program for kids of all ages.
Figure 4-16: Budding genius at work in Tuxpaint
4.9.6 Educational Games
-
Scratch and Scratch Jr. A free programming language and online community where you can create your own interactive stories, games, and animations.Home page: Scratch
Figure 4-17: Coding screen for Dance Party using Scratch
4.9.7 Tactics & Strategy Games
- Freeciv: A clone of Sid Meyer’s Civilization© (version I), a turn-based multiplayer strategy game, in which each player becomes the leader of a stone age civilization, trying to gain ascendency as the ages progress.
- Lbreakout2: LBreakout2 is a breakout-style arcade game where you use your paddle to aim a ball at bricks until all bricks are destroyed. Many levels and surprises. Installed by default.
- Lincity: A clone of the original Simcity. You must build and maintain a city and keep its people satisfied so that your population grows.
- Battle for Wesnoth: A highly-rated turn-based strategy game with a fantasy theme. Build your army and fight to regain the throne.
Figure 4-18: Trying to break through the first wall in Lbreakout
4.9.8 Windows games
A number of Windows games can be played in MX Linux by using a Windows emulator such as Cedega or DOSBox, or some may even run under Wine: see Section 6.1.
4.10 Google tools

Figure 4-19: Integrated Google Calendar and Contacts in Thunderbird
4.10.1 Gmail
Gmail accounts can be integrated into Claws-Mail and Thunderbird, see Section 4.1.2.
4.10.2 Google’s Contacts
Google’s Contacts can be linked into Thunderbird by using the add-on gContactSync.
MORE: gContactSync home page
4.10.3 Gcal
Gcal can be set up on a tab in Thunderbird with the add-ons Lightning and Google Calendar Tab.
4.10.4 Gtasks
Gtasks can be included in Thunderbird by ticking the Tasks entry of the calendar.
4.10.5 Google Earth
Google Earth for Linux is available from the repos. When you install it, it actually only places a GoogleEarthLinux.bin file in your /home folder. Open a terminal and enter:
make-googleearth-package
This command creates a *.deb file in the same location (name: googleearth followed by the version number) that can be installed in the standard fashion using dpkg.
4.10.6 Google Talk
There is a browser plugin called google-talkplugin available from the Google repos that allows you to make a voice or video call to someone from your Gmail account.
5 Software Management
5.1 Introduction
5.1.1 Methods
Synaptic is the recommended method for beginners to manage software packages, although other methods are also available and may be required for certain situations.
5.1.2 Packages
Software operations in MX are accomplished through the Advanced Package Tool (APT) system. Software is provided in the form of a package: a discrete, non-executable bundle of data that includes instructions for your package manager about installation. They are stored on servers called repositories, and can be browsed, downloaded, and installed through special client software called a package manager. The recommended package manager for MX is Synaptic, though the command-line utility apt-get is also included for those who prefer it. The graphical utility Gdebi is launched for downloaded*.deb files with a single click on the file name; an alternative is to open a terminal and use the command dpkg install packagename.deb
The majority of packages have one or more dependencies, meaning that they have one or more packages that must also be installed in order for them to work. The APT system is designed to automatically handle dependencies for you; in other words, when you try to install a package whose dependencies are not already installed, your APT package manager will automatically mark those dependencies for installation as well. It can happen that these dependencies can not be met, preventing the installation of a package.
5.2 Repositories
APT repositories (repos) are much more than just web sites with downloadable software. The packages on repository sites are specially organized and indexed to be accessed through a package manager, rather than browsed directly.
5.2.1 Standard repos
MX Linux comes with a set of enabled repositories that offer you both security and choice. If you are new to MX Linux (and especially if you are new to Linux), it is recommended that in general you stick with the default repositories at first. For security reasons, these repositories are digitally signed, meaning that packages are authenticated with an encryption key to make sure they are authentic. If you install packages from non-Debian repos without the key, you will get a warning that they could not be authenticated. To get rid of this warning and make sure your installations are secure, you need to install missing keys using Check Apt GPG (MX Tools).
Repositories are most easily added, removed, or edited through Synaptic, though they can also be altered by hand by editing the files in /etc/apt/ in a root terminal. In Synaptic, click Settings > Repositories, then click the button New and add the information. The repo information is often given as a single line, like this:
deb http://main.mepis-deb.org/mepiscr/mx-test/ mx-14 test
Be careful to note the location of the spaces, which separate the information into four chunks that are then entered into separate lines in Synaptic.

Figure 5-1: Repos, with one of the disabled MX test repos highlighted.
Some repositories carry special labels:
- contrib, which depend on or are accessory to non-free packages.
- non-free, which do not meet the Debian free software guidelines (DFSG).
- security, which contain security-related updates only.
- backports, which contain packages from newer versions of Debian that have been backwards compiled for Debian Stable (the version MX is built with) to keep your OS up-to-date.
- MX, which contain the special packages that make MX what it is.
The current list of standard MX repositories is kept in the MX/antiX Wiki.
5.2.2 Community repos
MX Linux has its own Community Repos with packages that the Packagers build and maintain. These packages are distinct from official MX packages coming from Debian Stable, and typically have been backported from Debian versions in development (testing or even experimental). The Community Repos are critical to MX Linux, since they permit an OS based on Debian Stable to stay abreast of important software developments.
NOTE: The two testing repos should only be enabled to download packages for testing, and immediately disabled afterward. They should not be used on main production machines or mission critical set-ups, as there is by definition a risk that they will break your system.
To find out more about what is available, who the packagers are, and even how to get involved, see MX Community Packaging Project.
5.2.3 Dedicated repos
In addition to the general repositories such as Debian, MX, and Community, there also exist a certain number of dedicated repositories associated with a single application. When you add one of them, either directly or through Synaptic, then you will receive updates. Some are preloaded but not enabled, others you will add yourself.
Here is a common example (VirtualBox):
deb http://download.virtualbox.org/virtualbox/debian/stable contrib
5.2.4 Development repos
One final category of repository exists for acquiring the most recent (and thus least stable) build of an application. This is done through a version control system such as Git that can be used by the end user to stay current with development. The user can check out a copy of the application source code into a directory on a local machine.
5.3 Synaptic
Synaptic is a friendly, easy-to-use frontend (GUI) to the APT packaging system. It is a graphical tool that allows you to install, remove, upgrade, downgrade, or get information on all the software packages available in the online repositories on your repository list. Note that your root password is required and, naturally, you will need to be connected to the Internet.
5.3.1 Installing and removing packages
Here are the basic steps for installing software in Synaptic:
- Click Start menu > System > Synaptic Package Manager, supplying the root password if necessary.
- Hit the Reload button. This button causes Synaptic to contact the online repository servers and download a new index file with information on what packages are available, what versions they are, and what other packages are required for them to be installed. If you get a message that some of the repositories failed to be contacted, wait a minute and then try again.
- If you already know the name of the package you are looking for, just click in the pane on the right and start typing, and Synaptic will incrementally search for what you type.
- If you don’t know the package’s name, use the Search box in the upper right corner to locate software based on name or keywords. This is one of Synaptic’s greatest advantages over other methods.
-
Alternatively, use one of the filter buttons in the bottom left corner:
- Sections provides subareas such as Editors, Games and Amusement, Utilities, etc. You will see a description of each package in the bottom pane, and can use the tabs to discover more information about it.
- Status groups packages by their installation situation.
- Origin will show packages from a specific repository.
- Custom Filters provides various filter options
- Search Results will show a list of previous searches for the Synaptic session you are in.
- Click the empty box next to the package you want and select Mark for Installation. If the package has dependencies, you will be notified and they will automatically be marked for installation as well. You can also just double-click the package if it is the only one you are installing.
- Right-click the package name again, and check carefully the packages listed under Mark Recommended for Installation; Mark Suggested for Installation is worth looking at as well.
- Some packages also have “Recommended” and “Suggested” packages that can be viewed via right-clicking the package name. These are additional packages that add functionality to the selected package, and it is a good idea to look them over.
- Click Apply to begin the installation. You can safely ignore any warning message: “You are about to install software that can’t be authenticated!”
- There may be additional steps: just follow the prompts as you receive them until the installation completes.
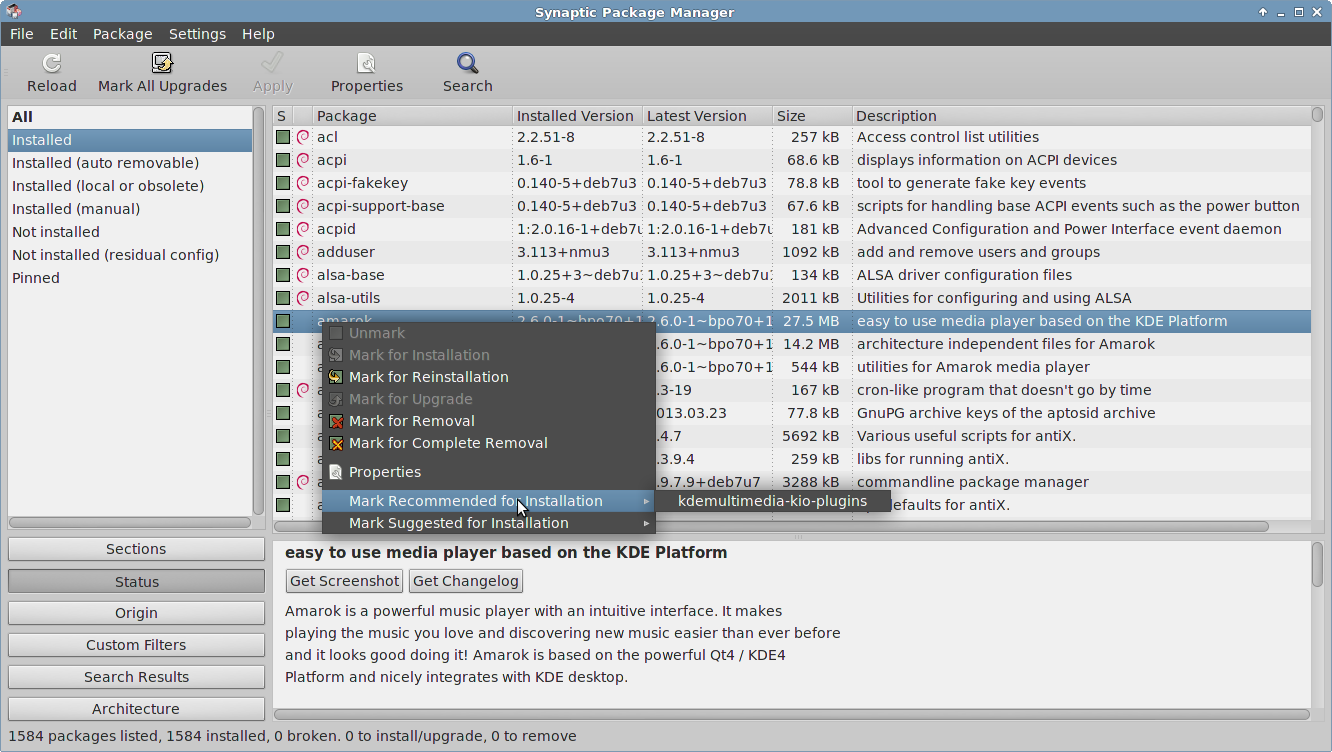
Figure 5-2: Checking recommended packages during package installation.
Removing software from your system with Synaptic seems as straightforward as installing, but there is more to it than meets the eye:
-
To remove a package, simply right-click it and select Mark for Removal or Mark for Complete Removal.
- Removal uninstalls the software, but leaves system configuration files in case you want to keep your settings.
- Complete Removal removes the software and the system configuration files as well (purging). Your personal configuration files related to the package will not be removed. Check also for other configuration file remnants in Synaptic, category Not installed (residual config).
- When you have other programs that depend on the package being removed, those packages will have to be removed as well. This usually happens when you remove software libraries, services, or command-line applications that serve as back-ends to other applications. Make sure you read carefully the summary Synaptic gives you before clicking OK.
- Removing large applications that are composed of many packages can bring complications. Many times these packages are installed using a meta-package, which is an empty package that simply depends on all the packages you need for the application. The best way to remove a complicated package like this is to inspect the dependency list for the meta-package, and remove the packages listed there. Take care, however, that you don’t uninstall a dependency of another application you want to keep!
- You may find that the status category Autoremoveable begins to accumulate packages. These were installed by other packages and are no longer needed, so you can click on that status category, highlight all the packages in the right pane, and then right-click them to remove.
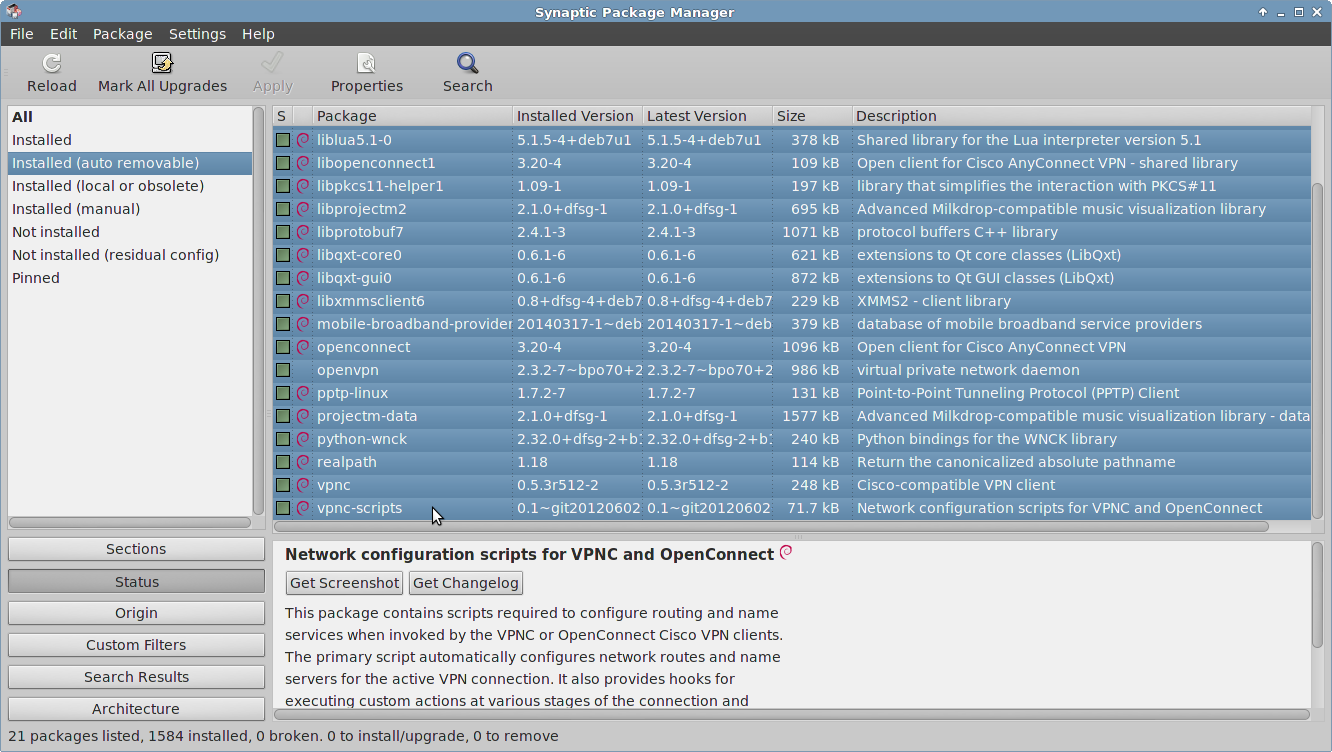
Figure 5-3: Getting ready to clear out the autoremovable packages.
5.3.2 Upgrading and downgrading
Synaptic enables you to quickly and conveniently keep your system up-to-date.
Unless you are using a manual method in a terminal, upgrading is typically triggered by the appearance of a green arrow on the Apt-notifier in the Notification Area. There are two ways to proceed when this arrow appears.
- Right click the Apt-notifier icon > Upgrade all packages. This is the faster method because there is no wait for software to load, run, etc. Examine the packages that are available for upgrade,then hit Return to complete the process.
-
Left click the icon to open Synaptic
- Click the Mark All Upgrades icon below the menu bar to select all available packages for upgrade, or click on the Installed (upgradable) link in the left panel to review the packages or to select upgrades individually.
- Click Apply to begin the upgrade, ignoring the warning message. As the installation process begins, you have the option of watching the details in a terminal within Synaptic.
- With some package upgrades, you may be asked to confirm a dialog, enter configuration information, or decide whether or not to overwrite a configuration file you have altered. Pay attention here, and follow the prompts until the upgrade completes.
Sometimes you may want to downgrade an application to an older version, for instance because of problems that arose with the new one. This is easy to do in Synaptic:
- Open Synaptic, supply the root password, and click Reload.
- Click on Installed in the panel on the left, then find and highlight the package you want to downgrade in the panel on the right
- On the menu bar, click Package > Force version...
- Select from the available versions on the pull-down list
- Click Force Version, then install in the usual manner.
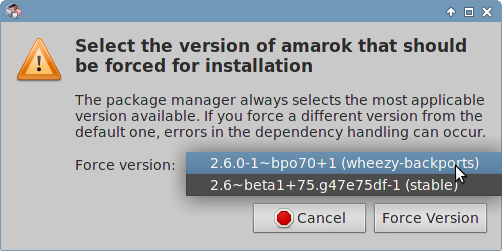
Figure 5-4: Using Force version to downgrade a package
Sometimes you may want to pin an application to a specific version to keep it from being upgraded in order to avoid problems with more recent ones. This is easy to do:
- Open Synaptic, supply the root password, and click Reload.
- Click on Installed in the panel on the left, then find and highlight the package you want to pin in the panel on the right.
- On the menu bar, click Package > Lock version...
- Synaptic will highlight the package in red and add a lock icon to the first column.
- To unlock, highlight the package again and click Package > Lock version (which will have a check mark).
5.4 Troubleshooting
Synaptic is very reliable, but sometimes you may get an error message. A full discussion of such messages may be found in the source given Section 5.5.4, so here we will only mention a couple of the most common.
- You get a message that some repos failed to download repository information: this is usually a transient event, and you simply need to wait and reload.
- If the installation of a package shows that software you have already installed and still want will be removed, click Cancel to back out of the operation.
- It may happen with a new repository that you see an error message after reloading that says something like: W: GPG error: [some repository URL] Release: The following signatures couldn’t be verified . This message appears because apt-get includes package authentication in order to improve security, and the key is not present. To fix this, click Start menu > System > MX Check Apt GPG and follow the prompts.
- Occasionally, packages will fail to install because their install scripts fail one or more safety checks; for instance, a package might try to overwrite a file that is part of another package, or require downgrading another package due to dependencies. If you have an install or upgrade that is stuck on one of these errors, it is called a broken package. To fix this, click on the Broken packages entry in the left panel. Highlight the package and try first to fix the problem by clicking Edit>Fix Broken Packages. If that is not successful, then right-click the package to uninstall it.
- Should you uninstall? Occasionally, conflicts in package dependencies can cause the APT system to require the uninstallation of a large number of important packages in order to install some other package. This is rare with the default configuration, but becomes increasingly likely as you add unsupported repositories. BE VERY ATTENTIVE whenever installing a package would require that others be removed! If a large number of packages are going to be removed, you may want to investigate another method of installing this application.
-
Should you keep? When upgrading, you may sometimes be informed that a new configuration file is available for a certain package, and be asked whether you want to install the new version or keep your current version.
- If the package in question is from an MX repository, it is recommended that you “install the maintainer’s version”
- Otherwise, answer “keep the current version” (N), which is also the default choice.
MORE: MX/antiX Wiki.
5.5 Other methods
5.5.1 Aptitude
Aptitude is a package manager that can be used instead of apt-get or Synaptic. It is available from the repos, and is particularly helpful when dependency problems arise. Can be run as a straignt CLI or as a primitive GUI.

Figure 5-5: Aptitude’s home screen (GUI), showing dependency resolver.
For details on this option, see the MX/antiX Wiki.
5.5.2 Deb packages
The software packages installed through Synaptic (and APT behind it) are in a format called deb (short for Debian, the Linux distribution that devised APT). You can manually install downloaded deb packages using the graphical tool Gdebi or the command-line tool dpkg. These are simple tools to install local deb packages. NOTE: if dependencies can not be satisfied, you will receive a notice and the program will stop.
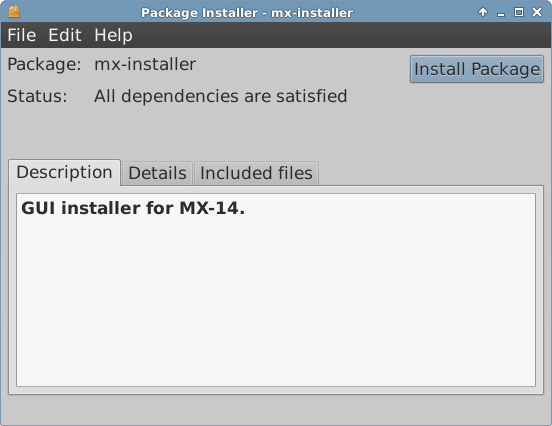
Figure 5-6: Gdebi ready to install.
- Navigate to the deb package you want to install and click on it. Gdebi will open the install dialog.
- Click Install.
- Enter your root password when prompted.
- Gdebi will attempt to install the package, and report the results.
- Navigate to the folder containing the deb package you want to install.
- Right-click and empty space to open a terminal and become root
-
Install the package with the command (substituting the real package name, of course): dpkg -i packagename.deb
-
If you are installing multiple packages in the same directory at the same time, you can do it all at once using: dpkg -i *.debNOTE: In a shell command, the asterisk is a wild card in the argument. In this case it will cause the program to apply the command to any file whose name ends with *.deb.
-
If required dependencies are not installed on your system already, you will get unmet dependencies errors as dpkg does not automatically take care of them. To correct these errors and finish the installation, run this code:apt-get -f install
- Apt-get will attempt to rectify the situation by either installing the needed dependencies (if they are available from the repositories), or removing your .deb files (if the dependencies cannot be installed).
5.5.3 CLI methods
It is equally possible to use the command line to install, remove, update, switch repositories and generally to manage packages. Instead of launching Synaptic to carry out common tasks, for instance, many users will just open a terminal, become root and use one of these commands.
Table 5: Common commands to manage packages
| Command | Action |
| apt-get install packagename | Install a certain package |
| apt-get remove packagename | Remove a certain package |
| apt-get purge packagename | Completely remove a certain package |
| apt-get autoremove | Clear out leftover packages after a removal |
| apt-get update | Refresh the package list from the repos |
| apt-get upgrade | Install all available upgrades |
| apt-get dist-upgrade | Intelligently handles changing dependencies with new versions of packages |
For more information, consult the man page for apt-get.
5.5.4 More install methods
Sooner or later some software that you want to install will not be available in the repositories and you may need to use other installation methods. These methods include:
- RPM packages: Some distributions of Linux use the RPM packaging system. RPM packages are similar to deb packages in many ways, and there is a command-line program available from MX Linux to convert RPM packages to debs called alien. It does not come installed with MX Linux, but is available from the default repositories. After you have installed it on your system, you can use it to install an rpm package with this command (as root): alien -i packagename.rpm. That will place a deb file with the same name in the location of the rpm file that you can then install as described above. For more detailed information on alien, see the internet version of its man page in the Links section at the bottom of this page.
- Source code: Any open-source program can be compiled from the programmer’s original source code if there is no other option. In ideal circumstances, this is actually a pretty simple operation, but sometimes you can run into errors that require a more skill to sort through. Source is usually distributed as a tarball (tar.gz or tar.bz2 file). See the Links for a tutorial on compiling programs.
- Miscellaneous: Many software developers package software in their own custom ways, usually distributed as tarballs or zip files. They may contain setup scripts, ready-to-run binaries, or binary installer programs similar to Windows setup.exe programs. In Linux, such programs often end in .bin. Google Earth, for example, is often distributed this way. When in doubt, consult the installation instructions provided with the software.
5.5.5 Links
- MX/antiX Wiki: Synaptic errors
- MX/antiX Wiki: Installing Software
- MX/antiX Wiki: Compiling
- Gdebi
- The Debian package management tools
- Debian APT Guide
- Wikipedia: Alien
6 Advanced use
6.1 Windows programs under MX Linux
There are a certain number of applications, both open-source and commercial, that will allow Windows applications to run under MX Linux. They are referred to as emulators, meaning that they replicate the functions of Windows on a Linux platform. Many MS Office applications, games and other programs can be run using an emulator with varying degrees of success ranging from near-native speed and functionality to only basic performance.
6.1.1 Open-source
Wine is the primary open-source Windows emulator for MX Linux. It is a kind of compatibility layer for running Windows programs, but does not require Microsoft Windows to run the applications. New Wine versions are rapidly packaged by the Community Repository members and made available to users.
DOSBox creates a DOS-like environment intended for running MS-DOS-based programs, especially computer games.
DOSEMU is software available from the repos that allows DOS to be booted in a virtual machine, making it possible to run Windows 3.1, Word Perfect for DOS, DOOM, etc.
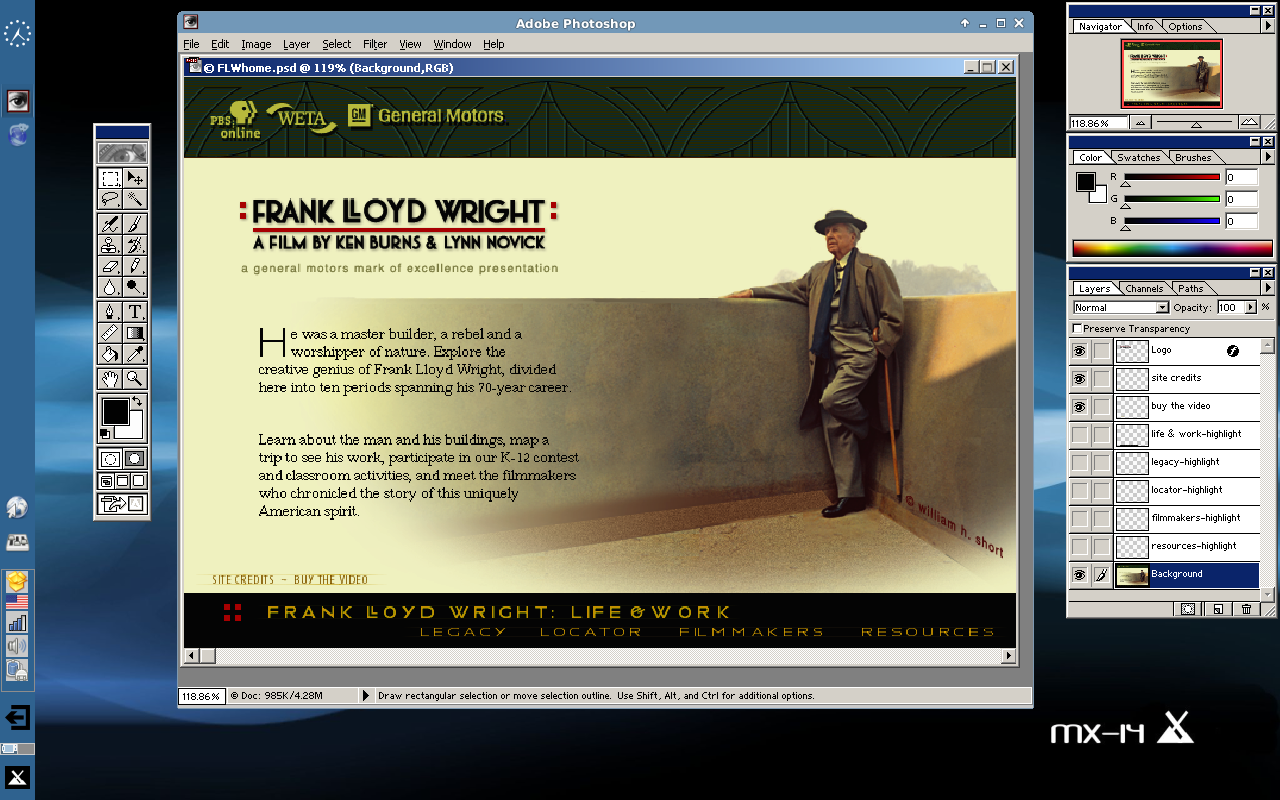
Figure 6-1: Photoshop 5.5 running under Wine
6.1.2 Commercial
CrossOver Office allows you to install many popular Windows productivity applications, plugins and games in Linux, without needing a Microsoft Operating System license. Supports Microsoft Word, Excel and PowerPoint (up to 2003) particularly well.
Cedega is designed to run DirectX and OpenGL games from the Microsoft Windows Platform under Linux. Popular games such as Elder Scrolls IV: Oblivion, Battlefield 2142, World of WarCraft, Madden 2007 and Civilization IV can be played on MX Linux with this application.
6.2 Virtual machines
Virtual machine applications are a class of programs that simulate a virtual computer in memory, allowing you to install any operating system on the machine. It is useful for testing, running non-native applications, and providing users the feeling of having a machine of their own. Many MX Linux users make use of virtual machine software to run Microsoft Windows “in a window” to seamlessly provide access to software written for Windows on their desktop. It is also used for testing to avoid installation.
6.2.1 Setup
A number of virtual machine software applications for Linux exist, both open-source and proprietary. MX makes it particularly easy to use VirtualBox, so we will focus on that here. For details and the most recent developments, see the Links section below. Here is an overview of the basic steps to set up and run VirtualBox:
- Installation. This is most easily done via the MX Package Installer (in MX Tools on the Menu). VirtualBox appears in the Misc section. This will enable the VirtualBox repository, download and install the latest version of VirtualBox. The repository will be left enabled, allowing automatic updates via apt-notifier.
- Post-installation. Check that your user belongs to the vboxusers group. Open MX User Manager > Group Membership tab. Select your username and make sure that ’vboxusers’ in the Groups list is ticked. Confirm and exit.
- Extension Pack. You should download and install the Oracle VM VirtualBox Extension Pack from the Oracle web site (see Links). After the file is downloaded, navigate to it with Thunar and click on the file’s icon. The Extension Pack will open VirtualBox and install automatically.
- Location. Virtual machine files are stored by default in your /home folder. They can be fairly large and if you have a separate data partition you may consider making the default folder there. Go to File>Preferences>General tab and edit the folder location.

Figure 6-2: Windows 2000 running in VirtualBox
6.2.2 Use
- Create a Virtual Machine. To create a virtual machine start VirtualBox, then click the New icon on the toolbar. You will need a Windows CD or a Linux ISO. Follow the wizard, accepting all suggested settings unless you know better — you can always change them later. You may need to increase the memory allocated to the Guest above the minimum default figure, still leaving sufficient memory for your Host OS. For Windows Guests, consider creating a larger virtual HD than the 10GB default – while it is possible to increase the size later, it is not a straightforward process. Select a Host Drive or Virtual CD/DVD Disk File
- Select a mount point. Once the machine is set up, then you can select the mount point to be either the Host Drive or a Virtual CD/DVD Disk File (ISO). Click Settings > Storage, and a dialog box will pop up where you will see in the middle a Storage Tree with an IDE Controller and a SATA Controller below it. By clicking on the CD/DVD Drive icon in the Storage Tree, you will see the CD/DVD Drive icon appear in the Attributes section in the right side of the window. Click on the CD/DVD Drive icon in the Attributes section to open a drop-down menu where you can assign the Host Drive or a Virtual CD/DVD disc file (ISO) to be mounted on the CD/DVD Drive. (You can select a different ISO file by clicking on Choose a Virtual CD/DVD disk file and navigating to the file.) Run the machine. The device you selected (ISO or CD/DVD) will be mounted when you start the virtual machine and your OS can be installed.
- GuestAdditions. Once your Guest OS is installed, be sure to install VirtualBox GuestAdditions by booting into the Guest OS, then clicking Devices >Install Guest Additions and pointing toward the VBoxGuestAdditions.iso that it will automatically locate. This will allow you to enable sharing files between Guest and Host and to adjust your display in various ways so that it suits your environment and habits.
- Moving. The safest way to move or change the settings of an existing Virtual Machine is to clone it: right-click the name of an existing machine > Clone, and fill in the information. To use the new clone, create a new Virtual Machine and in the wizard when you select the Hard Disk, choose "Use existing hard disk" and select the new clone’s *.vdi file.
- Documentation. Excellent documentation for VirtualBox is available through Help on the menu bar or as a PDF from the website.

Figure 6-3: Setting the ISO for a new VirtualBox guest (“Some OS”)
- Wikipedia: Virtual Machine
- Wikipedia: Comparison of virtual machine software
- VirtualBox home page
- VirtualBox Extension Pack
6.3 Alternate Window Managers
A window manager (originally WIMP: window, icon, menu, and pointing device) in Linux is essentially the component which controls the appearance of Graphical user interfaces and provides the means by which the user can interact with them. MX Linux is tightly tied to Xfce, as part of its overall approach, but other possibilities exist for users. MX Linux makes it easy to install the most popular alternatives through the MX Package Installer, as described below.

Figure 6-4: MATE running on top of MX Linux
- Gnome Ultra, a GTK+ based display manager and desktop that provides an ultra-light desktop environment.
- IceWM, a window manager for the X Window System whose goal is speed and simplicity.
- K Desktop Environment, or KDE for short, a very large and powerful environment. Two versions available: Lite and Standard; Lite offers more application choices. For installation and configuration when used over MX Linux, see the MX/antiX Wiki.
- LXDE is a fast and light desktop environment whose components can be installed separately.
- MATE is the continuation of GNOME 2 providing an intuitive and attractive desktop environment.
Once installed, you can choose the window manager you want from the Session Type pull-down menu on the default login screen (lightdm) and log in to as you normally would. If you replace the login manager with another from the repos, make sure you always have at least one available upon reboot.
6.4 Command Line
Although MX offers a complete set of graphical tools for installing, configuring, and using your system, the command line (also called the console, terminal, BASH, or shell) is still a useful and at times indispensable tool. Here are some common uses:
- Launch a GUI application to see its error output.
- Speed up system administration tasks.
- Configure or install advanced software applications.
- Execute multiple tasks quickly and easily.
- Troubleshoot hardware devices.
The default program to run a terminal in an MX desktop window is XFCE Terminal, which can be found at Start Menu > System > Xfce Terminal (Terminal Emulator). Some commands are only recognized for super user (root), while others may vary the output depending on user.
To obtain temporary root permissions:
- open Xfce Terminal.
- type su.
- enter root’s password (nothing will show on the screen)
You will recognize when Xfce Terminal is running with root privileges by looking at the prompt line right before the space where you type. Instead of a $, you will see a #; in addition, the user name changes to root written in red. If you try to run as a regular user a command that requires root privileges such as iwconfig, you may receive an error message that the command was not found, see a message box that the program must be run as root, or simply find yourself at the prompt again with no message at all.

Figure 6-5: User now has temporary administrative (root) privileges
6.4.1 First steps
- For more information on running Xfce Terminal for solving system problems, please refer to the topic Troubleshooting at the end of this section. Also, it is advisable to make backups of the files you are working on as a root user with the commands cp and mv (see below).
-
Though terminal commands can be fairly complex, understanding the command line is just a matter of putting together simple things. To see how easy it can be, open Xfce Terminal and try a few basic commands. This will all make more sense if you do it as a tutorial exercise rather than just reading it. Let’s start with a simple command: ls, which lists the contents of a directory. The basic command lists the contents of whatever directory you are currently in: ls
-
That’s a useful command, but it’s just a few short columns of names printed across the screen. Suppose we want more information on the files in this directory. We can add a switch to the command to make it print out more information. A switch is a modifier we append to a command to change its behavior. In this case, the switch we want is:ls -l
- As you can see on your own screen if you are following along, this switch provides more detailed information on the files in any directory.
-
Of course, we might want to see the contents of another directory (without going there first). To do this, we add an argument to the command, specifying which file we want to look at. An argument is a value or reference we add to a command to target its operation. By giving an argument of /usr/bin/, we can list the contents of that directory, rather than the one where we currently are. ls -l /usr/bin
-
There are a lot of files in /usr/bin/! It would be nice if we could filter this output so that only entries that contained, say, the word “fire”would be listed. We can do this by piping the output of the /ls/ command into another command, grep. The pipe, or │ character, is used to send the output of one command to the input of another. The command grep searches for the pattern you give it and returns all matches, so piping the output of the previous command to it filters the output.ls -l /usr/bin │ grep fire
-
Finally, suppose we want these results saved in a text file for use at a later time. When we issue commands, the output is usually directed to the console display; but we can redirect this output somewhere else, such as to a file, using the > (redirect) symbol to instruct your computer to make a detailed list of all the files that contain the word “fire” in a particular directory (by default your Home directory, and to create a text file containing that list, in this case named “FilesOfFire”ls -l /usr/bin │ grep fire > FilesOfFire.txt
- As you can see, the command line can be used to perform complex tasks very easily by combining simple commands in different ways.
6.4.2 Common commands
Here is a list of rudimentary terminal commands. For a complete reference, see the Links section, below.
Table 6: Filesystem navigation commands
| Command | Comment |
| cd /usr/share | Changes current directory to the given path: “/usr/share”. With no argument, cd takes you to your home directory. |
| pwd | Prints the current working directory path |
| ls | Lists the contents of the current directory. Use the -a switch to show hidden files as well, and the -l switch to show details on all files. Often combined with other terms. lsusb lists all the usb devices, lsmod all the modules, etc. |
Table 7: File management commands
| Command | Comment |
| cp sourcefile destinationfile | Copy a file to another filename or location. Use the -R switch (“recursive”) to copy entire directories. |
| mv sourcefile destinationfile | Move a file or directory from one location to another. Also used to rename files or directories and to make a backup: for example before changing a critical file such as xorg.conf you might use this command to move it to something like xorg.conf_BAK. |
| rm filename | Delete a file. Use the -R switch to delete a directory, and the -f switch (“force”) if you don’t want to be prompted to confirm each deletion. |
| cat file.txt | Prints the contents of a file on the screen. Only use on text files. |
| grep | Find a given string of characters in a given piece of text, and print the entire line it was on. Usually used with a pipe, e.g. cat somefile.txt Ⅰ grep /somestring/ will display the line from somefile.txt that contains somestring. To find a network usb card, for instance, you could type: lsusb Ⅰ grep Network. The grep command is case sensitive by default, use the -i switch to make it case-insensitive. |
| dd | Copies anything bit by bit, so can be used for directories, partitions, and whole drives. Basic syntax is dd if=<some file> of=<some other file> |
Table 8: Symbols
| Command | Comment |
| Ⅰ | The pipe symbol used to send the output of one command to the input of another. |
| > | The redirect symbol, used to send the output of a command into a file of device. Doubling the redirect symbol will cause the output of a command to be added to an existing file rather than replacing it. |
| & | Adding the ampersand to the end of a command (with a space before it) causes it to run in the background so that you don’t have to wait for it to complete to issue the next command. Double ampersand indicates that the second command should only be run if the first has been successful. |
For most new Linux users, the command line is mainly used as a troubleshooting tool. Terminal commands give quick, detailed information that can be easily pasted into a forum post, search box, or email when seeking help on the web. It is strongly recommended that you keep this information at hand when asking for help. Being able to refer to your specific hardware configuration will not only speed up your process of obtaining help, but also it will let others offer you more accurate solutions. Here are some common troubleshooting commands (see also Section 3.4.4). Some of them may not output information, or not as much information unless you are logged in as root.
Table 9: Troubleshooting commands
| Command | Comment |
| lspci | Shows a quick summary of detected internal hardware devices. If a device shows as /unknown/, you usually have a driver issue. The -v switch causes more detailed information to be displayed. |
| lsusb | Lists attached usb devices. |
| dmesg | Shows the system log for the current session (i.e. since you last booted). The output is quite long, and usually this is piped through grep, less (similar to most) or tail (to see what happened most recently). For example, to find potential errors related to your network hardware, try dmesg Ⅰ grep -i net. |
| top | Provides a real-time list of running processes and various statistics about them. Also available from the Start menu as Htop. |
- Many commands will print out a simple “usage information”message when you use the “ --help” or “-h” switch. This can be helpful for quickly recalling the syntax of a command. For example: cp --help
- For more detailed information on how to use a command, consult the command’s man page
- Manual pages are conveniently accessed through the Start menu by placing a hash mark and the command name into the search box at the top. For example, you can view the man page for the copy command with this entry in the search box: #cp
-
The man page may also be read at the console with the command man <commandname>. By default, man pages are displayed in the terminal’s most pager, meaning that only one screenful of the file is displayed at a time. Keep these tricks in mind to navigate the resulting screen:
- The space bar (or PageDown key) advances the screen.
- The letter b (or PageUp key) moves the screen backward.
- The letter q exits the help document.
You can create an alias (personal command name) for any command, short or long, that you want. Details in the MX/antiX Wiki.
6.4.3 Links
6.5 Scripts
A script is a simple text file that can be written directly from a keyboard, and consists of a logically sequenced series of operating system commands. The commands are handled one at a time by a command interpreter which in turn requests services from the operating system. The default command interpreter in MX is Bash. The commands must be understandable to Bash, and command lists have been established for programming use. A shell script is the Linux counterpart of batch programs in the Windows world.
Scripts are used throughout the Linux OS and applications that run on it as an economical method of executing multiple commands in an easily created and modified manner. During boot, for instance, many scripts are invoked to start up specific processes such as printing, networking, etc. Scripts are also used for automated processes, system administration, application extensions, user controls, etc. Finally, users of all kinds can employ scripts for their own purposes.
6.5.1 A simple script
Let’s do a very simple (and famous) script to get the basic idea.
-
Open the text editor Leafpad (Start Menu > Accessories),and type:#!/bin/bash
clear
echo Good morning, world! - Save that file in your home directory with the name SimpleScript.sh
- Right-click the file name, select Properties, and check “Allow this file to run as a program” on the Permissions tab.
-
Open a terminal and type: sh /home/UserName/SimpleScript.sh
- The line “Good morning, world!” will appear on your screen. This simple script doesn’t do very much, but it does establish the principle that a simple text file can be used to send commands to control your system’s behavior.
NOTE: All scripts open with a shebang as in the the beginning of the first line: it is a combination of a number sign, an exclamation point, and the path to the command interpreter. Here, Bash is the interpreter and it is found in the standard location for user applications.
6.5.2 A useful script
Let’s look at a useful script for the ordinary user that reduces all the moves involved in backing up multiple sets of files into a single keystroke. The script below relies itself on a system script called Rdiff-backup that would need to be installed from the repos for the script to work. It copies one directory to another, keeping a record of the differences in a special subdirectory so you can still recover files lost some time ago. (Incidentally, Rdiff-backup relies in turn on a script called Diff.)
In this example, a user named “newbie” wants to set up a script to back up documents, music, mail and pictures from the /home directory to an external drive.
1 #!/bin/bash
2 #
3 # This Rdiff-Backup script backs up to a second hard drive
4 # It must be run as root in order to mount the second hard drive
5
6 # To restore files, issue the command: cp -a /mnt/sda1/username /home
7 # To restore, but not overwrite:
8 # cp -a -i --”reply=no /mnt/sda1/username /home
9
10 # Mount the external devices
11
12 mount /dev/sdb1
13 mount /dev/sdb2
14 mount /dev/sdb3
15
16 # Execute the backup
17
18 rdiff-backup /home/newbie/Documents /mnt/sdb2/Documents
19 rdiff-backup /home/newbie/Music /mnt/sdb1/Music
20 rdiff-backup /home/newbie/Mail /mnt/sdb2/Mail
21 rdiff-backup /home/newbie/Pictures /mnt/sdb3/Pictures
22
23 # Unmount the external devices
24
25 umount /dev/sdb1
26 umount /dev/sdb2
27 umount /dev/sdb3
Now let’s look at this script’s components:
- Lines 2-8: a number sign has been placed in front of these lines (called “commenting them out”) to indicate to Bash that they are not part of the sequence of commands to be executed. Their purpose here is to provide anyone who looks at this script with information about such things as the script’s origin, creator, purpose, and license (metadata).
- Line 10: good scripts separate the commands into clearly labeled procedural sections, also in lines 15 and 22.
- Lines 12-14: the three devices to be used for the backup have to first be mounted so they are available to the system.
- Lines 18-21: here bash is told to use the system script rdiff-backup to compare the original directories (sources) with the backup directories (targets), copy over the differences it finds, and keep a record of the changes.
- Lines 25-27: once the backup work is done, the external drives are unmounted from the system.
Anyone who wanted to use such a script would have to carry out a few execution steps:
- Copy the whole script.
- Right-click the desktop and select Create New>Text file...
- Give the file a name that makes sense (no spaces, though), and add the “sh” extension so you will recognize it is a script. For this example, you might select Backup_DocsMusicMailPictures.sh
- Open the new text file and paste in the script.
- Change any names, locations, etc. to what they are on your particular system. In the example above, you may well have different names and/or locations for the directories to be backed up, and different devices where they are supposed to go.
- Save that script in a place you can easily find it when you need it, let’s say you make a new directory /home/scripts for it.
- Right-click the script, select Properties, click on the Permissions tab, and check the Is executable box and click OK.
- When you are ready to backup, open a terminal and type: sh /home/scripts/Backup_DocsMusicMailPictures.sh HINT: use the tab key to autocomplete the file name after you type the first few letters.
6.5.3 Pre-installed user scripts
The following scripts allow users to help keep their MX Linux installation up-to-date and running as a rolling release.
When run, smxi allows users to install a new kernel, install ATI and NVIDIA graphics drivers, run apt-get upgrade or apt-get dist-upgrade safely, and lots more! Written by a programmer named “h2”, the script is pretty much self explanatory, but for usage options, execute smxi -h.
smxi must be run outside of the X window system (i.e., not from the desktop) for most functions.
-
From your desktop:
- Press Ctrl-Alt-F1 to get to a terminal prompt.
- Log in as root (su and password)
- Type: smxi
-
At boot:
- Type e when on the GRUB menu to be able to edit it
- Add “3” to the end of the kernel line in GRUB’s menu entry for MX Linux
- The system will boot directly to the console.
- Log in as root (su and password)
- Type: smxi
smxi will ask a series of questions the first time it is run, including which system options you want to run. The following options are recommended:
- continue-no-changes
- apt-get
- apt-get dist-upgrade
After smxi has completed its operations it will ask if you want to restart the desktop. NOTE: Running smxi -G in a root terminal while inside a running X session allows certain features of smxi to run, such as removing unwanted kernels etc.
This h-2 script runs inside smxi or separately, and deals with installing graphical drivers (see also Nvidia_Install, below). Sgfxi currently supports ATI, fglrx and NVIDIA drivers. It also supports converting from or to xorg free drivers like ati, intel, or nv. Follow the procedure above to start the script, replacing smxi with sgfxi.
Sgfxi requires a working internet connection! Some wireless internet connections may be dropped when operating outside of X. If this applies to your internet connection either temporarily switch over to a wired internet connection before proceeding or use the ’Partial install in X, completion outside of X method’ instructions in the next section below.
The sgfxi script automatically downloads and installs the kernel headers and every thing else it needs. Then it downloads the binary graphic driver installers from either nvidia or ATI, prepares system, installs, then sets up xorg.conf, all in a fairly clean, reasonably intuitive way. Plus it updates itself so any new drivers released will be installed. Finally, sgfxi allows you to easily switch between proprietary non free drivers like ATI’s fglrx and nVidia’s nvidia driver and the free xorg drivers.
A third script from h-2 included in MX Linux is inxi, a convenient command-line system information script. Enter inxi -h in a terminal to see all the options available, which include an entire range from sensor output to the weather.
Created by MX Linux user kmathern, this script has two advantages over sgfxi:
- It can be run from your desktop (it will ask you for the root password when it starts)
- It will install the correct drivers for legacy Nvidia cards
Launch by clicking Start menu > System > Nvidia_Install, enter root password when the terminal opens, and follow the prompts.

Figure 6-6: Nvidia_Install begins its work
6.6 Advanced MX Apps
In addition to the configuration MX Apps discussed in Section 3.3, MX Linux includes utilities for the advanced user available from MX Tools.
6.6.1 Live remaster/persistence (RemasterCC)
WARNING: for use in a Live session only!
The primary purpose of live remastering is to make it as safe, easy, and convenient as possible for users to make their own customized version of MX Linux that can be distributed to other computers.
The idea is that you use a LiveUSB (or a LiveHD: a frugal install to a hard drive partition, see Section 8.4) as the development and testing environment. Add or subtract packages and then when you are ready to remaster, use use a simple remaster script or GUI to do the remaster and then reboot. If something goes horribly wrong, simply reboot again with the rollback option and you will boot into the previous environment.
WARNING: for use in a Live session only!
Persistence is a hybrid between a LiveMedium and a full install; it allows you to retain any files you install or add during a live session.
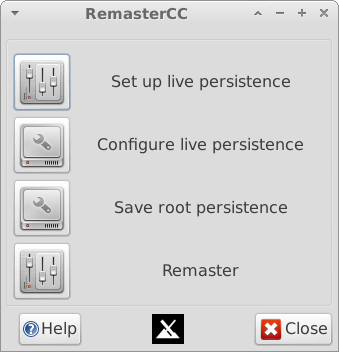
Figure 6-7: The remaster and persistence tool
HELP: here.
6.6.2 Save system to ISO (Snapshot)
This tool makes a copy of your running system and creates an ISO from it.
The ISO can be put on a LiveMedium in the usual manner (see Section 2.2). To then install from the LiveMedium, open a root terminal and enter the command: minstall.
Figure 6-8: Opening screen of Snapshot
HELP: here.
6.6.3 Create live USB (antix2usb)
WARNING: for use on a hard drive installation only!
There are two tools available by default to create MX Linux live on a USB stick: antix2usb and UNetbootin (see Section 2.3.3). antix2usb is limited to Linux use, but has a number of advantages:
- It is faster.
- It gives users the significant advantage of setting up persistence prior to creating the USB stick.
- It allows a partition to be created on the USB drive.
- It offers other advanced options.
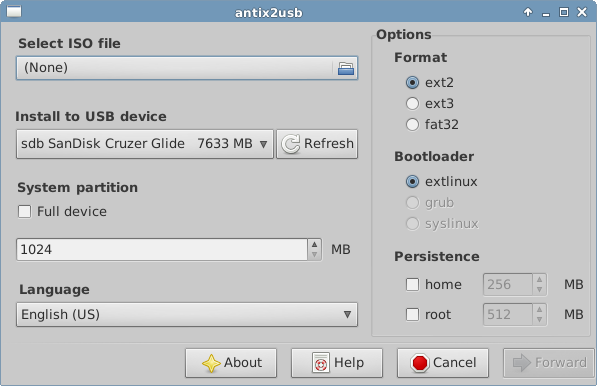
Figure 6-9: Main screen of antix2usb
HELP: here.
6.7 SSH
SSH (Secure Shell) is a protocol used to securely log onto remote systems. It is the most common way to access remote Linux and Unix-like computers. MX-14 comes with the main packages necessary to run SSH in active mode, the main one being OpenSSH, a free implementation of the Secure Shell that consists of a whole suite of applications.
-
Start or restart the ssh daemon as root with the command:/etc/init.d/ssh start
-
To start the ssh daemon automatically when the computer starts, click Settings manager > Session and Startup > Application Autostart. Click the Add button, then in the dialog box insert a name such as StartSSH, a short description if you want, and the command /etc/init.d/ssh startPress OK and you are done. Once you restart, the SSH daemon will be active.
- KDE users on MX Linux can do the same using Preferences > Settings > Start & Stop > Automatic Start.
6.7.1 Troubleshooting
Occasionally, SSH does not work in passive mode, sending a message of denied connection. Then you can try the following:
-
Edit as root the file ’/etc/ssh/sshd-config’. About line 16 you will find the parameter ’UsePrivilegeSeparation yes’. Change that to UsePrivilegeSeparation no
- Add yourself (or the intended users) to the group ’ssh’ using MX User Manager or editing as root the file /etc/group.
-
Sometimes the certificates can be missing or outdated; an easy way to rebuild them is to run (as root) the command ssh-keygen -A
-
Check if sshd is running by typing/etc/init.d/ssh statusThe system should answer ’[ ok ] sshd is running.’
- If you are using a firewall, check that port 22 is not blocked. It must allow IN and OUT traffic.
MORE: Openssh manual
7 Under the hood
7.1 Introduction
MX Linux ultimately inherits its fundamental design from Unix, an operating system that has been around in various forms since 1970, much earlier than MS-Windows. From that Linux was developed, from which Debian develops its distribution. The base operating system is the topic of this section. Users coming from Microsoft Windows typically find a lot of unfamiliar concepts, and get frustrated trying to do things the way they are accustomed to doing them.
This section will give you a conceptual overview of some basic aspects of MX Linux, and how they differ from other systems to help ease your transition.
7.2 The file system structure
There are two basic uses of the term “file system”. The first is the Operating System’s Filesystem. This refers to the files and their organization that the operating system uses to keep track of all the hardware and software resources it has as its disposal while running.
The other use of the term file system refers to the Disk Filesystem, designed for the storage and retrieval of files on a data storage device, most commonly a disc drive. The Disk Filesystem is set when the disk partition is first formatted, prior to writing any data on the partition.
One of the first problems many new Linux users struggle with is how the file system works. If you have been looking around your MX Linux system trying to find the C:\ drive or D:\ drive, for instance, you are searching in vain: MX Linux handles hard drives and other storage media differently from Windows. Rather than having a separate file system tree on every device, MX Linux has a single file system tree ( called the /root/ of the file system) which is marked “/” and contains every attached device. When a storage device is added to the system, its file system is attached to a directory or subdirectory of the file system; this is called mounting a drive or device. If you open Thunar and click on File System in the upper left pane, you will notice a number of directories with names based on the Unix Filesystem Hierarchy Standard.

Figure 7-1: The MX filesystem viewed in Thunar
Here is a simple description of the major directories in MX Linux along with a common example of when users commonly work with files there:
-
/bin
- This directory contains binary program files which are used by the system during startup, but which also may be required by user actions once the system is fully up and running.
- Example: Many basic command-line programs, such as the Bash shell, and utilities like /dd/, /grep/, /ls/, and /mount/ are located here, in addition to programs only used by the OS.
-
/boot
- As you might guess, files that Linux needs to boot are located here. The Linux kernel, the core of the Linux operating system, is kept here, as are bootloaders such as GRUB.
- Example: no file here is commonly accessed by users.
-
/dev
- In this directory are special files that link to the various input/output devices on the system.
- Example: no file here is commonly accessed directly by users, except in CLI mounting commands.
-
/etc This directory contains configuration files for the system such as as well as application configuration files.
- Example: The file /etc/fstab specifies mount points for additional filesystems on devices, partitions, etc. that can be configured for your optimal use.
- Example: display problems sometimes involve editing the file /etc/X11/xorg.conf.
-
/home
- Here the user’s personal directories (data and settings) reside. If there is more than one user, a separate subdirectory is set up for each. No user (except root) can read another user’s home directory. The user’s directory contains both hidden (where the filename is preceded by a dot) and visible files; hidden files can be revealed by clicking View >Show Hidden Files in Thunar.
- Example: users typically organize their own files at first by using default directories such as Documents, Music, etc.
- Example: your Firefox profile is located in .mozilla/firefox
-
/lib
- This directory contains shared object libraries (analogous to Windows DLL’s) that are required at boot time. In particular, kernel modules will be found here, under /lib/modules.
- Example: no file here is commonly accessed by users.
-
/media
- Files for removable media such as CDroms, floppy drives, and USB memory sticks are installed here when the media are automounted.
- Example: After dynamically mounting a peripheral device like a flash drive, you may access it here.
-
/mnt
- Physical storage devices must be mounted here before they can be accessed. After drives or partitions are defined in the /etc/fstab file, then their file system is mounted here.
- Example: Users can access drives and partitions mounted here.
-
/opt
- This is the intended location of major third-party application subsystems installed by the user.
- Example: if you install Google Earth, this is where it will be installed. Some distros also place user-installed programs in /usr subdirectories.
-
/proc
- The location for process and system information
- Example: no file here is commonly accessed by users
-
/root
- This is the /home directory/ for the root (administrator) user. Note that this is not the same as “/” the file system root.
- Example: no file here is commonly accessed by users, but files saved while logged in as the root user may be saved here.
-
/sbin
- Programs are installed here if they are required by the system startup scripts but will not normally be run by users, other than root—in other words, system administration utilities.
- Example: no file here is commonly accessed by users, but this is where files like modprobe and ifconfig are located.
-
/tmp
- This is the location of temporary files produced by programs—such as compilers—as they run. In general, these are short-term temporary files, of use to a program only while it is running.
- Example: no file here is commonly accessed by users.
-
/usr
- This directory contains many things for user applications, and is analogous in some ways to the Windows directory “Program Files”.
- Example: many executables are located in (/usr/bin)
- Example: documentation (/usr/docs) and configuration files, graphics and icons are in (/usr/share).
- Example: many files specific to MX Linux are located in /usr/local/
-
/var
- This directory contains files that are constantly changing while Linux is running, e.g. logs, system mail and queued processes.
- Example: you can look in /var/log/ when trying to determine what happened during a process
The disk file system is something about which the average user does not need to be much concerned. The default disk file system used by MX Linux is called ext4, a version of the ext2 file system that is journaled —i.e., it writes changes to a log before enacting them, rendering it more robust. The file system ext4 is set during installation when your your hard drive is formatted.
By and large, ext4 has more years on its track record than any of its rivals, and combines stability and speed; for these reasons, we do not recommend installing MX Linux onto a different disk file system unless you are well-educated in the differences. However, MX Linux can read and write to many other formatted disk filesystems, and may even be installed on some of them, if for some reason one of them is preferred over ext4.
- Wikipedia Filesystem
- Wikipedia. Comparison of filesystems
- Wikipedia Ext4
- Log files in the /var/log/ directory
7.3 Permissions
MX Linux is an account-based operating system. This means that no program can run without a user account to run under, and any running program is thereby limited by the permissions granted to the user who started it.
In MX Linux there is one and only one user account that has permission to do everything; this account is called root (not to be confused with the “root” of the file system, mentioned in Section 6.1 see: root file system. The root user has a unique password that is set during system installation. When you run programs (such as Synaptic or MX Linux System Assistants) that need to access or change protected operating system files and directories, you will be prompted for the root password. Once you enter it, MX Linux will be able to make the specific changes it needs.
NOTE: Much of the security and stability that Linux is known for hinges on the proper use of limited user accounts, and the protection provided by default file and directory permissions. For this reason, you should operate as root only for a procedure that requires it. Never log into MX Linux as root to run the computer for normal activities!
The default file permissions structure in Linux is fairly simple, but more than adequate for most situations. For each file or folder, there are three permissions that can be granted, and three entities (owner/creator, group, others/world) to which they are granted. The permissions are:
- Read permission means that data can be read from the file; it also means the file can be copied. If you don’t have read permission for a directory you can’t even see the names of files listed in it.
- Write permission means that the file or folder can be changed, appended, or deleted. For directories, it specifies whether a user can write to files in the directory.
- Execute permission means whether or not the user can run the file as a script or program. For directories, it determines whether or not the user can enter and make it the current working directory. Every file and folder acquires a single user designated as its owner when it is created on the system. (Note that if you move a file from another partition where it has a different owner, it will keep the original owner; but if you copy and paste it, it will be assigned to you.) It also has a single group designated as its group, by default the group to which the owner belongs. The permissions you grant to others affect everyone who isn’t the owner or in the owning group.
NOTE: For advanced users, there are additional special attributes beyond read/write/execute that can be set: sticky bit, SUID, and SGID. For more information, see Links section.
There are many tools available in MX Linux to view and manage permissions.
- Thunar To view or change a file’s permissions, right-click the file and select Properties. Click the Permissions tab. Here you can set the permissions granted to the owner, group, and others using the pull-down menus. For some files (like scripts , for instance), you need to check the box to make them executable, and for folders you can check a box to limit the deletion of files inside it to the owners. NOTE: you must be operating as root to change the permission of a file or directory whose owner is root.
- MX User Manager is an easy way to change permissions by associating a user with specific groups.
-
CLI commands Although MX User Manager covers most daily situations, sometimes it can be preferable to deal with the command line. Basic permissions are represented by r (read), w (write) and x (execute). To view permissions of a file on the command line, type this: ls -l NameofFileThe -l switch will cause the file to be list in long format, displaying its permissions among other information.-rw-r--r-- newbie users 277 Jan 7 14:42 .asoundrc
The bolded “rw-r--r-- ” bit right after the opening dash (indicating it is a regular file) contains read/write/execute permissions for owner, group and others: 9 characters total. Here it shows that the owner has read and write but not execute (rw-), but the group and others can only read (r--). The owner in this case is specified to be “newbie” who belongs to the group “users”.
If for some reason it was necessary to change the ownership of this file to root using the command line, you would use the chown command like this:
chown root /home/newbie/.asoundrc
For details on using chown, as well as the more detailed chmod, see Links section.
7.4 Configuration files
With only rare exceptions, program and system settings on MX Linux are stored in discrete plain text configuration files; there is no “Registry” which requires special tools to edit. Most configuration files are just simple lists of parameters and values which are read by programs when they launch to determine their behavior.
7.4.1 User config files
Files that hold individual user settings (such as high scores for your games, or the layout of your desktop) are stored within a Users home directory, typically as a hidden file or directory, and can only be edited by that user or by root. These personal configuration files are actually less often edited directly than system files because most of the user configuration is done graphically through the applications themselves. When you open an application and click Edit > Preferences, for example, your selections are written to a (usually hidden) configuration file in your user directory. Likewise in Firefox, when you type about:config in the address bar, you are editing the hidden configuration files.
7.4.2 System config files
Files that hold system-wide configurations or defaults (such as the file that determines which services automatically launch during boot up) are largely stored in the /etc/ directory and are only editable by root. Most of these files are never touched directly by regular users, such as these for instance:
- /etc/rc.d/rc5.d — Contains files to control runlevel 5 into which MX Linux boots after login.
- /etc/sysconfig/keyboard — Used to configure the keyboard.
- /etc/network/interfaces — Defines internet interfaces on the system.
Some configuration files can contain just a few lines, or even be empty, while others may be quite long. The important point is that if you are looking for a configuration file for an application or process, head for the /etc directory and look around.
7.4.3 Example
Sound problems can be solved with a number of graphical and command-line tools, but once in a while a user needs to edit directly the system-wide configuration file. For many systems, this will be /etc/modprobe.d/snd-hda-intel.conf. It is a simple file whose top paragraph looks like this:
# some chips require that the model be set manually
# for example asus g71 series may need model=g71v
options snd-hda-intel model=auto
# for example asus g71 series may need model=g71v
options snd-hda-intel model=auto
To try to get sound, you might decide to substitute the exact information about the sound model in place of the word “auto.”. To find out your sound model, you could open a konsole and type: lspci │ grep Audio
The output will depend on the system, but it will take the following form:
00:05.0 Audio device: nVidia Corporation MCP61 High Definition Audio (rev a2)
Now you can plug that information back into the configuration file:
# some chips require that the model be set manually
# for example asus g71 series may need model=g71v
options snd-hda-intel model=nvidia
# for example asus g71 series may need model=g71v
options snd-hda-intel model=nvidia
You would save the file, reboot the machine, and hopefully your sound should be working. You could also try more precision by using model=nvidia mcp61 instead, if the first did not work.
7.5 Runlevels
MX Linux boots up by executing the program init. After completing the boot process, init executes all start scripts in a directory specified by the default runlevel (this runlevel is given by the entry for id in /etc/inittab). Like most other Linux versions, MX Linux has 7 runlevels:
Table 10: Runlevels in MX Linux
| Runlevel | Comment |
| 0 | Halt the system |
| 1 | Single-user mode: provides a root console without logon. Useful if you lose your root password |
| 2 | Multiuser with no network |
| 3 | Console logon, no X (i.e. no GUI) |
| 4 | Not used/custom |
| 5 | Default GUI logon |
| 6 | Reboot the system |
MX Linux defaults to runlevel 5, therefore any init scripts set up in the level 5 config file will run at boot.
Understanding runlevels can be handy. When users have a problem with X Window Manager, for instance, they can not correct it on the default runlevel 5, because X is running on that level. But they can get to runlevel 3 to work on the problem in one of two ways.
- From the Desktop: press Ctrl-Alt-F1 to get out of X. To actually drop to runlevel 3, become root and type telinit 3; this will stop all the other services still operating on runlevel 5.
- From the GRUB menu: press e (for edit) when you see the GRUB screen. On the subsequent screen, add a space and the number 3 at the end of the line of boot options located one above the lowest line (the actual boot command). Press F-10 to boot.
Once the cursor is at a prompt, login with your normal username and password. Useful commands when you are looking at the prompt on runlevel 3 include:
Table 11: Common runlevel 3 commands
| Command | Comment |
| runlevel | Returns the number of the runlevel you are on. |
| halt | Run as root. Shuts the machine down. If that does not work on your system, try poweroff. |
| reboot | Run as root. Reboots the machine. |
| <application> | Runs the application, as long as it is not graphical. For instance, you can use the command nano to edit text files, but not leafpad. |
| Ctrl-Alt-F7 | If you used Ctrl-Alt-F1 to drop out from a running desktop but did not continue down to runlevel 3, this command brings you back to your desktop. |
| telinit 5 | Run as root. If you are on runlevel 3, enter this command to get to the login manager lightdm. |
NOTE: these commands may change in the future if MX Linux switches to a new system manager.
7.6 The kernel
To provide a background, here is a simplified diagram and description of the kernel’s position in a Linux OS, borrowed from Anatomy of the Linux kernel.
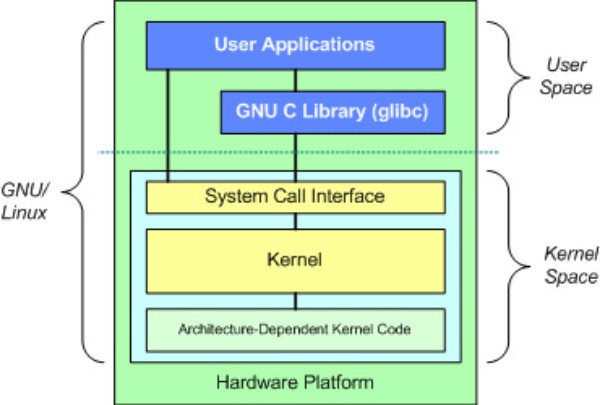
Figure 7-2: Diagram of the Linux kernel
At the top is the user space, or application space. This is where the user applications are executed. Below the user space is the kernel space. Here, the Linux kernel exists. There is also the GNU C Library (glibc). This provides the system call interface that connects to the kernel and provides the mechanism to transition between the user-space application and the kernel. This is important because the kernel and user application occupy different protected address spaces. And while each user-space process occupies its own virtual address space, the kernel occupies a single address space.
Unlike other software on your system, the kernel is not upgraded automatically except below the minor revision level (indicated by the third number in the kernel name). Here is a basic approach for manually upgrading the Linux kernel on your system.
- Ask yourself some questions: Why do I want to upgrade the kernel? Is there a driver I need for new hardware, for instance? Am I aware that I might have problems of one kind or another?
-
First, find out what you currently have installed. Open a terminal and enter inxi -S. For instance, a user of the default MX 14.3 PAE would see something like this:$ inxi -S
System: Host: mx-custom Kernel: 3.14-0.bpo.3-686-PAE i686 (32 bit)
Desktop: Xfce 4.10.3 Distro: MX-14.3 Symbiosis
Be sure to write down the name of the kernel (bolded above) from the output of that command.
- Second, select and install a new kernel. Open Synaptic, search on linux-image and look for a higher kernel number that matches the architecture (e.g., 686) and processor (e.g., PAE) that you already have, unless you have a good reason to change. A default MX 14.3 PAE user would see at least this possibility: linux-image-3.16-0.bpo.2-686-PAE Note that the new kernel must match the host computer’s architecture and processor. Install the one you want or need in the usual manner.
-
Third, install the linux-headers package that match the new kernel you selected. There are two methods of doing this.
- Look carefully at the Synaptic entries beginning linux-headers and match the kernel. For instance, if you selected linux-image-3.16-0.bpo.2-686-PAE, then you would install: linux-headers-3.16-0.bpo.2-686-PAE
-
Alternatively, you can install the headers more easily after rebooting into the new kernel by typing the following code in a root terminal: apt-get install linux-headers-$(uname -r)Headers will also be installed if you use a command such as m-a prepare.
- When you reboot, you will automatically boot into the highest available kernel. If it doesn’t work, you have the option to return to what you were using: reboot, and when you see the GRUB screen highlight Advanced Options for whatever partition you want to boot into, then select the kernel and press enter.
Other considerations and choices exist with respect to kernels:
- Other pre-rolled kernels exist such as the Liquorix kernel, which is a version of the Zen kernel and is intended to provide a better desktop use experience in terms of responsiveness, even under heavy loads such as during gaming, plus low latency (important for audio work). That is most easily installed for MX 14.x through Synaptic: enable the Community Repository testing repos (Synaptic) to see and select it.
- Distros (e.g., MX’s code-parent antiX) often roll their own.
- Knowledgeable individuals may compile a specific kernel for a particular reason.
- Wikipedia: Linux kernel
- Anatomy of the Linux kernel
- Linux kernel archives
- Interactive map of Linux kernel
7.7 Kernel panic and recovery
A kernel panic is a relatively rare action taken by the MX Linux system when it detects an internal fatal error from which it cannot safely recover. It can be caused by a number of different factors that range from hardware problems to a bug in the system itself. When you get a kernel panic, try rebooting with the MX Linux LiveMedium, which will overcome temporarily any software problems and hopefully allow you to see and offload your data. If that doesn’t work, then unplug all unnecessary hardware and try again.
Your first concern is to access and secure your data. Hopefully, you have it backed up somewhere. If not, you can use one of the data recovery programs such ddrescue that is supplied with MX Linux. Your last resort is to take your hard drive to a professional recovery business.
There are a number of steps you might have to take to recover a functional MX Linux system once you have your data safe, although ultimately you may have to reinstall using the LiveMedium. Depending on the type of failure, the following steps may be undertaken:
- Remove packages that broke the system.
- Reinstall the graphic driver.
- Reinstall GRUB using MX Boot Repair.
- Reset the root password.
- Reinstall MX Linux, checking to keeping /home on Screen 2 so that your personal configurations will not be lost.
Be sure to ask on the Forum if you have any questions about these procedures.
8 Glossary
Introduction
Linux terms can be confusing and offputting at first, so this Glossary provides a list of the ones used in this Manual to get you started.
- applet: A program designed to be executed from within another application. Unlike an application, applets cannot be executed directly from the operating system.
- backend: Also /back-end./ The backend includes the various components of a program that process the user input entered through the frontend. See also frontend.
- backport: Backports are new packages that have been recompiled to run on a released distribution in order to keep it up-to-date.
- BASH: The default shell (command-line interpreter) on most Linux systems as well as on Mac OS X, BASH is an acronym for Bourne-again shell.
- BitTorrent: Also/bit torrent/ or /torrent./ A method invented by Bram Cohen to distribute large files without the need for a single individual to provide the hardware, hosting and bandwidth resources required.
- boot block: An area of a disk outside the MBR having information for loading the operating system that is needed to start a computer.
- bootloader: Program that initially chooses an operating system to load after the BIOS has finished initializing the hardware. Extremely small in size. the bootloader’s only job is to hand control of the computer over to the Operating System’s kernel. Advanced bootloaders offer a menu to choose between several installed operating systems.
- chainloading: Also /chain loading./ Instead of directly loading an operating system, a boot manager like GRUB can use chain loading to pass control from itself to a boot sector on a hard disk partition. The target boot sector is loaded in from disk (replacing the boot sector from which the boot manager itself was loaded) and the new boot program is executed. In addition to when it is necessary, as in booting Windows from GRUB, the advantage to chainloading is that each operating system on the hard disk drive —and there could be dozens— can be responsible for having the correct data in it’s own boot sector. So GRUB residing in the MBR need not be rewritten every time there are any changes. GRUB can simply chainload the relevant information from the boot sector of a given partition whether it has changed or remained the same since the last boot time.
- cheat code: Codes can be entered when booting a LiveMedium to change the booting behavior. They are used to pass options to the MX LInux operating system to set parameters for particular environments.
- command line interface (CLI): Also known as console, terminal, command prompt, shell, or bash. This is a UNIX-style text interface, which MS-DOS was also designed to resemble. A root console is one where administrative privileges have been acquired after entering the root password.
- desktop environment:The software which provides a graphical desktop (windows, icons, desktop, task bar, etc) for an operating system user.
- disk image: A file containing the complete contents and structure of a data storage medium or device such as a hard drive or DVD. See also ISO.
- Distribution: A Linux Distribution, or distro, is a particular packaging of the Linux kernel with various GNU software packages, and different desktops or window managers. Since —unlike the proprietary code used in the Microsoft and Apple OS’s— GNU/Linux is Free,Open-Source Software, literally anyone in the world who has the ability can freely build on what has been done and innovate a new vision of a GNU/Linux operating system. MX Linux is a distro based on the Debian Linux family.
- file system: Also file system. This refers to the way that files and folders are logically arranged on a computer’s storage devices so they may be found by the operating system. It can also refer to the type of formatting on a storage device, such as the common Windows formats NTFS and FAT32, or the Linux formats ext3, ext4 or ReiserFS, and in this sense refers to the method actually used to encode binary data on the Hard Disk Drive, floppy, flash drive, etc.
- firmware. The small programs and data structures that internally control the electronic components
- free-as-in-speech: The English word “free” has two possible meanings: 1) without cost, and 2) without restrictions. In part of the open-source software community, an analogy used to explain the difference is 1) “free” as in beer vs. 2) “free” as in speech. The word /freeware/ is used universally to refer to software that is simply without cost, whereas the phrase /free software/ loosely refers to software that is more properly called open-source software, licensed under some type of open source license.
- frontend: Also front-end. The frontend is the part of a software system that interacts directly with the user. See also backend.
- GPL: The GNU General Public License. This is a license under which many operate: A program designed to be executed from within another application. Unlike an application, applets cannot be executed directly from the operating system.n-source applications are released. It specifies that you may view, modify, and redistribute the source code of applications released under it, within certain limits; but that you may not distribute the executable code unless you also distribute the source code to anyone who asks for it.
- Graphical User Interface (GUI): This refers to a program or operating system interface that uses pictures (icons, windows, etc), as opposed to text (command-line) interfaces.
- home directory: One of the 17 top-level directories branching from the root directory in MX Linux, /home contains a subdirectory for every registered user of the system. Within each Users home directory s/he has full read-write privileges. Further, most of the user-specific configuration files for various installed programs are stored in hidden subdirectories within the /home//username/ directory —as is downloaded email. Other downloaded files usually go by default into the home//username//Documents or /home//username//Desktop subdirectories.
- IMAP: The Internet Message Access Protocol is an protocol that allows an e-mail client to access a remote mail server. It supports both on-line and off-line modes of operation.
- interface: A point of interaction between computer components, often referring to the link between a computer and a network. Examples of interface names in MX Linux include WLAN (wireless) and eth0 (basic wired).
- IRC: Internet Relay Chat, an older protocol to render the exchange of text messages easier.
- ISO: A disc image following an international standard that contains data files and file system metadata, including boot code, structures, and attributes. This is the normal method for delivering Linux versions such as MX Linux over the Internet. See also disk image.
- kernel: The layer of software in an operating system that interacts directly with the hardware.
- LiveCD/DVD: A bootable compact disc from which one can run an operating system, usually with a complete desktop environment, applications, and essential hardware functionality.
- LiveMedium: a general term that includes both LiveCD/DVD and LiveUSB.
- LiveUSB: A USB flash drive on which an operating system has been loaded in such a way that it can be booted and run. See LiveDVD.
- mac address: a hardware address that uniquely identifies each node (connection point) of a network. It is formed of a string of usually six sets of two-digits or characters, separated by colons.
- man page: Short for manual, man pages typically contain detailed information about switches, arguments, and sometimes the inner workings of a command. Even GUI programs often have man pages, detailing available command line options.
- MBR: Master Boot Record: the first 512-byte sector of a bootable hard disk drive. Special data written to the MBR enables the computer’s BIOS to pass the boot process off to a partition with an installed operating system.
- md5sum: A program that calculates and verifies a file’s data integrity. The MD5 hash (or checksum) functions as a compact digital fingerprint of a file. It is extremely unlikely that any two non-identical files will have the same MD5 hash. Because almost any change to a file will cause its MD5 hash to also change, the MD5 hash is commonly used to verify the integrity of files.
- mirror: Also mirror site. An exact copy of another Internet site, commonly used to provide multiple sources of the same information to supply reliable access to large downloads.
- module: Modules are pieces of code that can be loaded and unloaded into the kernel upon demand. They extend the functionality of the kernel without the need to reboot the system.
- mountpoint: The place on the root file system where a fixed or removable device is attached (mounted) and accessible as a subdirectory. All computer hardware needs to have a mountpoint in the file system to be usable. Most standard devices such as keyboard, monitor and your primary hard disk drive are mounted automatically at boot.
- mtp: MTP stands for Media Transfer Protocol and operates at the file level so that your device doesn’t expose its entire storage device Older Android devices used USB mass storage for transferring files back and forth with a computer
- NTFS®: Microsoft’s New Technology File System debuted in 1993 on the Windows NT Operating System, geared to business networks, and with revisions entered the mainstream Windows user’s desktop computers in later versions of Windows 2000. It has been the standard file system since Windows XP was introduced in late 2001. Unix/Linux-oriented folk say it stands for “Nice Try File System”!
- open-source: Software whose source code has been made available to the public under a license that allows individuals to modify and redistribute the source code. In some cases, open-source licenses restrict the distribution of binary executable code.
- package: A package is a discrete, non-executable bundle of data that includes instructions for your package manager about installation. A package doesn’t always contain a single application; it might contain only part of a large application, several small utilities, font data, graphics, or help files.
- package manager: A package manager such as (Synaptic or Gdebi) is a collection of tools to automate the process of installing, upgrading, configuring, and removing software packages.
- Panel: The highly configurable panel in Xfce4 appears by default at the left side of the screen and contains navigation icons, open programs and system notifications.
- Partition Table: A partition table is a hard disk architecture that expands on the older Master Boot Record (MBR) partitioning scheme using globally unique identifiers (GUID) to enable the existence of more than the original four partitions.
- port: A virtual data connection that can be used by programs to exchange data directly, instead of going through a file or other temporary storage location. Ports have numbers assigned for specific protocols and applications, such as 80 for HTTP, 5190 for AIM, etc.
- repo: A shortened form of repository.
- repository: A software repository is an internet storage location from which software packages may be retrieved and installed via a package manager.
-
root: Root has two common meanings in Unix/Linux OSs, and they are intimately connected, but the distinction is important to understand.
- The root file system is the basic logical structure of all the files the operating system can access, whether programs, processes, pipes or data. It should follow the Unix Filesystem Hierarchy Standard, which specifies where in the hierarchy to locate all types of files.
- The root user who owns the root file system —and so has all permissions necessary to do anything to any file. While it is sometimes necessary to temporarily assume the powers of the /root user/ to install or configure programs, it is dangerous and violates the basic security structure of Unix/Linux to log in and operate as /root/ unless absolutely necessary. In a command line interface, a regular user can temporarily become root by issuing the command su then entering the root password.
- runlevel: A runlevel is a preset operating state on a Unix-like operating system. A system can be booted into any of several runlevels, each of which is represented by a single digit integer. Each runlevel designates a different system configuration and allows access to a different combination of processes (i.e., instances of executing programs). See Section 7.5.
- script: An executable text file, containing commands in an interpreted language. Usually refers to BASH scripts which are used extensively “under the hood” of the Linux operating system, but other languages may be used as well.
- session: A login session is the period of activity between a user logging in and logging out of a system. In MX Linux, this typically indicates the lifetime of a particular user “process” (the program code and its current activity) that Xfce invokes.
- source code: The human-readable code in which software is written prior to being assembled or compiled into machine-language code.
- switch: A switch (also /flag/, /option/ or /parameter/) is a modifier appended to a command to change its behavior. A common example is -R (recursive), which tells the computer to carry out the command through all subdirectories.
- symlink: Also symbolic link and soft link. A special type of file that points to another file or directory and not to data. It allows the same file to have different names and/or locations.
- tarball: An archiving format, like zip, popular on the Linux platform. Unlike zip files, though, tarballs may use one of a number of different compression formats, such as gzip or bzip2. They usually end in file extensions like .tgz, .tar.gz, or .tar.bz2. Many archive formats are supported in MX with a graphical application called Archive Manager. Usually an archive can be extracted simply by right-clicking on it in Thunar.
- Unix: Also UNIX. The operating system which Linux is modeled after, developed in the late 1960’s at Bell Labs and used primarily for servers and mainframes. Like Linux, Unix has many variations.
- UUID (Universally Unique IDentifier). A universally unique identifier (UUID) is a 128-bit number that identifies unique Internet objects or data.
- window manager: A component of a desktop environment that provides the basic maximize/minimize/close/move functions for windows in the GUI environment. Sometimes it can be used as an alternative to a full desktop environment. In MX Linux, the default window manager is Xfce4.
- X: Also X11, xorg. The X Window System is a networking and display protocol which provides windowing on bitmap displays. It provides the standard toolkit and protocol to build graphical user interfaces (GUIs) on Unix-like operating systems and OpenVMS, and is supported by almost all other modern operating systems.


